fbpx

1911 Reliability Secrets

Fluff and Buff
Fluff and Buff

©2000 , John L. Marshall

The 1911 pistol, John Browning’s large-caliber pistol triumph, is both lauded and condemned in the firearms world. It’s lauded for its power, simplicity, excellent trigger, and reliability under adverse conditions. It’s condemned as being antiquated, heavy, over-powerful, and not always reliable with specialty ammo. Some say it’s not optimally safe in the hands of the untrained, but I’d have to say that NO pistol is safe in the hands of one who is untrained it its use.

Yet in spite of some detractors, the 1911, or Government Model, is the most ubiquitous combat pistol on the planet, being made by scores of manufacturers and spawning a huge aftermarket accessory industry all its own. As a combat or self-defense arm, it is THE pistol of choice of the professionals. Ask any expert, and he or she will tell you that in the hands of one schooled in its use, a properly-set-up 1911 pistol in .45 ACP caliber is unparalleled in efficacy.

Still, few firearms professionals will use a 1911 just as it comes from the box. The prime consideration in a self-defense pistol on which you must stake your life is reliability, and the 1911s the experts carry have been tweaked to make them as close to 100% reliable as human hands can make them. Although the classic 1911 design is extremely reliable with G.I. hardball ammunition, reliability with modern ammo of softpoint, hollowpoint or semiwadcutter design can be a sometimes thing. To its credit, the original design of the pistol will digest some pretty wild ammo designs almost all the time, but “almost all the time” is definitely not good enough when you must stake your life on a handgun. It must work all the time, every time with whatever you want to feed it!

Here we will examine the things you, as the owner of a new-in-the-box 1911 can do to make it ultimately reliable. Most of the things we will discuss can be done with hand tools, or in some cases a high-speed miniature hand tool such as the Dremel. While these techniques require a modicum of skill and care, they are not beyond the realm of most amateur craftsmen. We will examine each part of the 1911 design which can be modified for optimum reliability, and why the modifications are considered desirable.

Throat
Throat

The Barrel

Most barrels of modern manufacture (since the middle 1980s) come already “throated,” or widened, in the ramp area. This is the best type of barrel to start with. Earlier barrels have a narrow feed ramp which is designed to feed hardball ammo only. These barrels are best throated first by a competent gunsmith who really understands the 1911 design. Although proper throating is not beyond the realm of a competent amateur with a Dremel tool, the possibility of ruining an otherwise good barrel demands that this task be left to the professional. However, once the barrel is properly throated, or if you have one that has come from the factory already throated, there are still some things you can do to the barrel to enhance reliability.

First, note the transition area between the barrel feed ramp and the inside of the chamber. If this area is sharp, it must be lightly curved, or rounded, so that the round will feed smoothly over that “ledge.” This can be accomplished with a file or a Dremel tool. Take it easy here – the object is not to extend the ramp into the chamber area, but simply to lightly round off that sharp edge. Then the filing or grinding marks can be smoothed and polished with successively finer grades of sandpaper, finishing off with crocus cloth and a polishing compound such as “Flitz” on a cleaning patch or a Dremel polishing tip.

Next, note the hood of the barrel. In earlier barrels, the part of the hood that contacts the slide was perfectly flat, perpendicular to the axis of the barrel. Later barrels have a proper 45-degree bevel on the lower half of this hood contact area. The purpose of this bevel is to eliminate a “catch point” for semiwadcutter bullets which would prevent proper chambering. If that bevel exists on your barrel, all you will need to do is polish the bevel, using the same technique mentioned before, using successively finer grades of sandpaper and/or the polishing head of your Dremel tool with a polishing compound. If the bevel does not exist, it is an easy task with a Dremel tool to grind the bevel. Take care to maintain a 45-degree inward angle, following the curve of the barrel hood, and to take off no more than 50% of the surface area of the hood where it contacts the barrel. Then finish by polishing this bevel area.

Now look at the area where the hood mates up with the chamber area of the barrel. There should be no sharp edges here. If there are, take a small rat-tail or half-round file and lightly round those sharp edges. Then polish the filed area.

Now place the barrel into its slot in the frame and push it back and down until the link support legs contact the back of the slot in the frame. The barrel should rest on the curved support surfaces of the frame. Note the gap between the bottom edge of the feed ramp in the barrel and the forward edge of the feed ramp in the frame. This gap should be at least 1/32nd of an inch, and could be as much as 1/16th of an inch. If there is a smaller gap than this, (or no gap at all), the chambering cartridge can and probably will hang up on the lower lip of the barrel’s ramp. That gap is absolutely crucial to smooth chambering. If the gap is not at least 1/32nd of an inch, the solution is to file the bottom of the barrel feed ramp back until that gap is achieved. Then the ramp is re-shaped carefully with files or a Dremel grinder so that the barrel feed ramp is once again close to the bottom of the barrel. Be careful – do not extend the ramp much, if at all, deeper into the chamber, and keep the same upward angle as before. In the 1911 design, the ramped barrel leaves a portion of the case unsupported, and if the ramp is too deep, it increases the possibility of a case blowout. This could have serious consequences for the pistol and for you!

The next step is to bring the ramp area of the barrel to a mirror polish. This can be accomplished by hand, using finer and finer grades of sandpaper, crocus cloth, and then finishing with Flitz. Again, the objective is simply to polish, not deepen the ramp into the chamber area.

When a round is fed into the chamber from the magazine, it comes up the frame and barrel ramps, and then deflects off the roof of the chamber of the barrel, straightening itself out for the final direct push into the chamber. For this reason, it is advantageous that the inside of the chamber be very smooth so as to allow little or no friction as the nose of the bullet deflects downward. Here again, the answer is polishing. You do not want to widen the chamber out of spec, but you do want to take off any roughness. The felt polishing head of the Dremel and some Flitz polishing compound is perfect for this task, or you can do the same thing with a tight-fitting cleaning patch and Flitz, pushing it in and out of the chamber area. Do not ride up over the headspace ledge in the chamber; this should remain clearly defined and relatively sharp. Look at your work with a magnifying glass, and stop when you have a smooth chamber surface.

The locking lugs on the barrel need a bit of attention. The forward edge of each locking lug should be lightly “cut” or chamfered with the edge of a file. Just a little does it. Follow the curve around each lug. Polish these cuts with fine sandpaper. The objective here is to help the locking lugs cam up into their seats in the slide smoothly and easily.

This completes the necessary work on the barrel. The main objective is for the chambering cartridge to have a smooth, glass-like surface to work against wherever it contacts the barrel on its way in.

Feed Ramp
Feed Ramp

The Frame

There is one main area of the frame which must be addressed with respect to reliability. This is the feed ramp, which in most factory-fresh pistols is pretty rough, with plenty of tooling marks. The objective here is to polish the ramp until there is a very smooth surface for the chambering round to work against. Take great care not to change the angle of the ramp, and to maintain a fairly sharp edge at the upper lip of the ramp. In some cases, if the tooling marks are pretty deep, it’s not wise to try to take down the ramp until the tool marks disappear completely – just polish-flatten the marks out a bit. Keep in mind that you absolutely must have that 1/32nd of an inch gap between the frame ramp and the lower edge of the barrel. Pistols have been absolutely ruined by improper shaping and polishing of the feed ramp, and the only solution is either a new frame or inserting and welding a new feed ramp surface. Both solutions are expensive, so be careful! Again, the standard technique of using successively fine grades of sandpaper, crocus cloth, and polishing compound is utilized. Your finger makes a good backing for the polishing medium; I advise against using a dowel or other hard object, as this may alter the shape of the ramp unduly.

Many “experts” recommend the use of a Commander-length extended ejector in the standard 1911. By the way, the Commander ejector does not fit without modification, but aftermarket extended ejectors are designed which fit the standard 1911. The purpose of this modification is to get the fired case out of the pistol earlier in the recoil stroke, thus helping to prevent “stovepipe” jams. In actual practice, I’ve never had a problem with the standard ejector in full-size 1911s. The disadvantage of an extended ejector is that it may not always allow the ejection of loaded rounds, and you’d have to let them extract carefully down into the magazine well. If you must have an extended ejector, consider re-shaping the ejection port to allow clearance of ejected loaded rounds. On the Commander-length and Officer’s-length pistols, the extended ejector is a good idea, since the recoil stroke of the slide is shorter. Most of these pistols come standard with an extended ejector anyway, so it’s a moot point. Extended ejectors do hustle the fired case out of the pistol muy pronto, and every bit of hustle helps with the abbreviated pistols. It probably can’t hurt the full-size pistols except for the loaded-round problem, but it’s not really necessary, either.

The Slide

There are “old” slides and “new” slides. Older slides have the ejection port cutout fairly high in the slide, so the depth of the cutout is just below the dividing line between the curved upper portion of the slide and the flat side. Newer slides have the ejection port cut much lower, anywhere between .465″ and .480″ to the bottom of the slide. This allows the ejected case an easy exit, and reduces “dings” in the fired cases. Some slides, such as the Colt Gold Cup and the newer “enhanced” slides, also have a clearance cut, or “flare” milled into the rear edge of the ejection port. This is to allow the ejected case to roll over backwards easily as it exits the port. It also reduces the likelihood of a “stovepipe” jam where the ejected case is caught in the ejection port. Not much needs to be done to the newer lowered and flared ejection ports other than polishing the inside lower surface of the port where there is a bevel. If you have an older slide where the distance between the bottom of the port and the lower edge of the slide is more than .480″, then it’s advantageous to lower the port to at least that depth. You can have this professionally milled out, or you may choose to do it yourself, using the aluminum oxide grinding wheel of a Dremel tool. With the stripped slide in a vise, move the grinding wheel forward and back along the bottom edge of the port, taking care to take full-length strokes evenly. Let the high-speed wheel do the work; use very little downward pressure. Take great care to keep the successive cuts parallel with the bottom edge of the slide. Do not cut into the lower rear of the port to the extent that you expose the head of the extractor. Once the bottom edge of the port is evenly lowered to .480″ or a bit less from the bottom edge of the slide, bevel the inside lower edge of the port at an angle similar to the one that was there when you started. The Dremel grinding wheel can accomplish this easily. Use the wheel or a file to carefully chamfer the outside lower edge a bit so that it is no longer sharp. The rear of the ejection port can now be flared using the conical grinder of the Dremel tool; use photos or a newer slide as a guide, and again, don’t get into the extractor area so as to expose its head. The next step is to polish the inside bevel along the lower edge of the port, the flare area and the outside edges of the port. If you’ve been careful, cold blue can touch up a blued slide, and stainless slides require no refinishing.

The next area of the slide that requires attention is the face of the breech. In most pistols, you will find extensive tooling marks. These can grab at the rear of the cartridge as it slides up under the extractor, and the friction may be enough to prevent chambering. Your objective is to polish the breech face to smooth out or even eliminate the tool marks. Care must be taken not to remove too much material, as this would push headspace beyond the allowable maximum. If the tool marks are very deep, you can only smooth them out a bit. Strip the slide, and then use a small, flat file to do the initial work. Then using the file as a backer, use successively finer grits of sandpaper to achieve a smooth surface. Finish with Flitz on a patch. Take care not to change the angle of the breech face, which should be perpendicular to the base of the slide.

Cocking Lug
Cocking Lug

Note the firing pin hole in the face of the breech. This should be lightly chamfered, or beveled. A sharp edge here can catch the edge of a chambering cartridge. I’ve used one of the conical heads of a Dremel, held in the firing pin hole by hand, and rotated with the fingers to achieve this chamfer. It doesn’t take a lot; just enough to remove any sharp edge.

Now look at the area of the slide where the disconnector rides; the ridge that runs along the base of the slide back of the breech face. Most pistols will show tool marks here, and these should be smoothed and polished. If the tool marks are deep, don’t even try to polish them out all the way. Simply smooth them up a bit. This gives an easier ride for the disconnector as it presses against the base of the slide, and will help prolong the life of the disconnector. Finer and finer grits of sandpaper, applied with a finger, and then Flitz do the trick. If you reduce the depth of the disconnector track too much, you will have real problems, so go lightly here.

Next, just as you chamfered the forward edges of the locking lugs on the barrel, you will also want to lightly chamfer the forward edges of the locking grooves in the slide. Use the edge of a triangular file to “cut” these edges slightly and then smooth up the chamfering with finer grits of sandpaper. The slight chamfers on the barrel and in the slide will help to make a smooth lockup with minimum resistance.

The Extractor

A properly shaped and tuned extractor is crucial to reliability in the 1911 pistol. Most factory extractors and many aftermarket extractors need attention to achieve the optimum in reliability

1911 Extractor Modifications

The first area of attention is the extractor groove itself, where the rim of the cartridge rides up into the groove from below. The extractor, when properly fit, does not “snap” over the rim of the cartridge, but the cartridge pushes up from below as it is fed from the magazine. One of the surest ways to ruin an extractor is put a round directly into the chamber, and then drop the slide. This forces the extractor to snap over the rim, and in time will ruin the extractor’s shape or break it.

The extraction groove must be beveled at the bottom of the groove so that the rim of the cartridge is cammed gradually into the groove. In this way, the cartridge rim will more gradually push the extractor back to tension it over the extractor groove in the cartridge and it can slide up more easily. This bevel should run from the bottom edge of the extractor groove up to the midway point in the extractor’s groove. The forward inside edge of the extractor groove should be beveled out to form a slight angle; since the cartridge is at an upward angle when it feeds, this allows the rim to slide into the groove at the proper angle. The angle of the majority of the inside extractor claw should not be altered by filing or polishing. It should remain at 90 degrees or even have a slight inward grasp. The lower edge of the extractor claw should be beveled and rounded; the forward outside edge should be rounded. The top and bottom rear edges of the body of the extractor should be beveled for about an inch and ½ so as to allow “wiggle room” for the extractor within its hole in the slide. Then the tip of the extractor and the inside of the extractor groove should be polished. The initial shaping is done by small files; the polishing is done with fine sandpaper and Flitz.

Proper tensioning of the extractor is vital to reliability. Too much tension and chambering will be severely impeded or prevented. Too little tension, and extraction and ejection will be weak or non-existent. An old gunsmith trick to test the tension of the extractor is to remove the slide from the pistol, and push a round of ammo up under the extractor from below. With proper tension, the round should be held in place regardless of how the slide is turned, yet when the round is moved downwards from its center position about 1/10 of an inch, the round should drop off.

Tension is adjusted by removing the extractor, reversing it in the extractor hole in the slide, and pressing sideways one way or the other to increase or decrease tension. The depth of the extractor’s protrusion into the case area is controlled by removing a slight amount of metal from the inside of the rounded protrusion just back of the extractor claw with a file.

Recoil Spring

The correct recoil spring poundage is important to the reliability of your pistol. Too light a spring will batter the pistol and weaken the chambering process; too heavy a spring will result in failures to extract and eject, or in “stovepipe” stoppages. A too-heavy spring is also rough on the extractor. A too-quick closing of the slide will force the extractor over the rim of the cartridge, rather than allowing the cartridge to move up under the extractor in a controlled feed. It also has the effect of battering the slide stop unduly. The stock recoil spring in a standard 1911 is rated at 16 pounds. Moving up one notch to 18 ½ pounds will be about right for most pistols shooting hardball and other full-power defense ammo. Anything heavier is too much. Be sure to test the new recoil spring by shooting the pistol one-handed and loosely. It should function positively. If not, go back to the 16-pound spring.

An extra-power recoil spring also aids in preventing the slide from opening too soon. You may have seen “skid marks” on primers, caused by the firing pin still being extended against the primer when the slide unlocks. Eventually, this could break the firing pin. The use of a heavier recoil spring often cures this problem.

Commander-size pistols do well with a 20-pound spring for full-power ammo, and Officer’s-size pistols utilize a 24-pound spring well for the same purpose. As long as it’s not overdone, a stiffer recoil spring will aid in positive chambering and lengthen the life of the pistol. If the slide becomes difficult to retract using a stiffer spring, consider using one of the progressive-rate springs which are easier to get started at the start of the slide’s recoil stroke. The jury is out as far as the so-called “shock buffers” are concerned. These little polymer doughnuts slip over the recoil spring guide and cushion the shock of the slide banging against the end of the recoil spring guide. To this extent they are good, but they must be replaced regularly as they get chewed up. Having one disintegrate inside a defense pistol in a pucker situation is not something I would want to have happen, and for that reason I don’t use them. Likewise, there is controversy over the use of a full-length recoil spring guide in a defense pistol. Theoretically, the full-length guide keeps the recoil spring from kinking in its channel, and assures uniformity in the recoil stroke. It has the disadvantage of preventing a “press check” of the pistol, and of preventing one-handed racking of the slide by pressing the recoil spring plug against a shelf, shoe or other solid object. It is doubtful if the full-length guide increases accuracy, but you may gain some life from the recoil spring. Recoil springs should be replaced about every 2-3 thousand rounds anyway, as they gradually lose their strength over time and usage.

Firing Pin Spring

I highly recommend the use of an extra-power firing pin spring in every 1911 pistol. In series 70 pistols, it helps guard against an inadvertent discharge if the pistol is dropped muzzle-down on a hard surface. It also retracts the firing pin more quickly to help avoid primer “skid marks.” Plus, it’s extra insurance against the firing pin stop dropping down at the end of the recoil stroke and tying up the pistol or putting it out of action completely.

Even with a low-power mainspring (hammer spring), a heavier firing pin spring will allow the firing pin plenty of momentum for sure ignition of the primer. The mainspring on 1911s was designed with plenty of overkill, and even with a 30% reduction in the strength of the mainspring, a heavy firing pin spring is still a fine thing and will usually work quite satisfactorily.

Slide Stop

The slide stop is often overlooked in reliability work. Once in a while the slide stop will activate during a string of fire, locking the slide back even though the last round has not been expended. There are two causes for this. One is that the nose of the ammo being used in the gun will lightly tap the projection of the slide stop inside the magazine well, popping it up prematurely. The solution here is to lightly file back the projection where it is getting “bopped,” but not enough so the follower doesn’t activate it properly after the last round is fired.

The second cause is usually an overweight slide stop. The “extended” slide stop is particularly notorious for this. The slide stop simply pops up from its own inertia as the pistol recoils. An extended slide stop is the answer to a non-existent question, and no serious defensive handgunner should use one (slide stop operation should be with the weak hand in a reload situation, not the shooting hand). So if you are tempted to fancy up your pistol with an extended slide stop, don’t. Some aftermarket slide stops are designed to be less bulky than the factory product. This keeps the mass of the part down and helps to prevent premature pop-up. A trick you may use to help prevent the phenomenon is to file a transverse groove with a small triangular file in the back of the slide stop where it meets the slide stop plunger in the down position. Any tendency for the slide stop to pop up is countered by the pressure of the plunger in the groove. If properly done, it should not impede the upward movement of the stop after the last round is fired when it’s activated normally by the magazine follower. If you want to get fancier, a Dremel tool can be utilized to grind a slight “dimple” in the slide stop at the same location, and it serves the same purpose.

Firing Pin Stop

While an extra-power firing pin spring will usually prevent it, occasionally you will have a firing pin stop disengage from its slot in the rear of the slide, either dropping down to tie up the slide, or coming off the pistol completely. The quick fix is to utilize a sharp punch and hammer and throw up some burrs on the inside of the firing pin stop. This will make the stop fit more tightly in its groove in the slide and the extractor. A better fix is to buy an oversize aftermarket part which can be fit tightly and closely by filing. Be sure to get the right part – series 80 pistols utilize a different stop from their series 70/G.I. cousins.

Magazines

A good magazine is the heart of any reliability work on the 1911 pistol. It’s as integral a part as the slide or frame. Good magazines aren’t cheap; my advice is not to scrimp. Get the best you can. Wilson-Rogers mags have an excellent reputation, and some people swear by Chip McCormick’s Power Mags. Either should serve you well. Be sure to test-fit the mag in your particular gun before you buy it. It should lock the slide back when empty, and drop free of the gun when you hit the magazine release button. Polish the insides of the feed lips. If you will look at the edge of the magazine at the top, you will see a rub mark where the magazine release bears against the side of the magazine as it’s pushed home. File a slight bevel at the top of the mag where the rub mark begins. While this doesn’t bear on reliability, it does ease the insertion of magazines during a speed reload, and prevents undue wear in a critical area. Be sure to test-fire each magazine in your gun with your load of choice; it should function 100%. Maintain your magazines by disassembling them and cleaning them periodically. Use no oil inside the magazine; it will only attract dirt and powder debris. Wipe the magazine spring with a lightly-oiled rag; that’s all the lubrication required. Use stainless mags in preference to blued ones; they resist rust far better, and rust inside or outside of a magazine is your enemy. Magazine springs eventually wear out, although many a tale is told of filled-to-capacity mags working fine after years of being loaded. If you begin to experience “ride-over” failures to chamber, suspect the mag spring and either replace it or get a new magazine.

The magazine spring must be stiff enough to pop the next round up quickly into the path of the rapidly-reciprocating slide. This is usually more of a problem with the compact 1911s than the full-size models, as their slides don’t retract as far. You’ll see a “failure to chamber” malfunction most often with the smaller pistols on the last round from the magazine. Extra-strength mag springs are commercially available; those from Wolff are praised. See if using one doesn’t cure the problem.

Again, all the above work is well within the ability range of a careful craftsman, and once your 1911 is modified as specified, it should work all the time, every time. Having your 1911 go “bang” every time you pull the trigger is crucial if you want to use it as a defense pistol! I hope this summary of reliability secrets has been helpful to you, whether you want to undertake the work yourself or have it performed by a gunsmith.

The Best .380 Ammo For Range Training & Self-Defense

The .380 ACP ammo (9×17mm) was developed by John Moses Browning and introduced in 1908 by Colt Manufacturing Company for its Model 1908 pocket hammerless semi-automatic pistol. The .38 ACP inspired Browning’s new creation, designed and manufactured for blowback pistols. The .380 ACP is light and compact but has less stopping power and a shorter range than other modern ammo. Average .380 ammunition is an 85-95 grain bullet measuring .380 inch in diameter. The round is rimless, straight-walled, and equipped with low-pressure percussion caps. Despite its shortened range and stopping power, the .380 Auto remains a favorite among those who want a small pistol for concealed carry and/or personal defense.

In 1912, .380 ACP cartridges launched in Belgium, where they adopted the moniker “9mm Browning Short.” The round remained popular throughout World War II. Military forces around the globe used the .380 ACP until many replaced it with the more popular 9mm cartridge. European police forces used the .380 until the 1980s when they changed in favor of the more powerful 9×19mm Parabellum. The parameters of the .380 make it ideal for use in a backup weapon such as a clutch piece.

Other names for .380 ACP Ammo include 9mm Browning, 9mm Browning Court, .380 Auto, 9mm Short, 9mm Corto, 9mm Kurz, and 9×17mm. The .380 ACP shouldn’t be confused with .38 ACP.

.380 ACP On The Range

Best .380 ACP Range Training Ammo

When it comes to range training, choosing the best ammo should be relatively easy. The first thing that shooters tend to look for aside from the appropriate cartridge is the price. It’s easy to shoot through hundreds or thousands of rounds in a short period of time. Buying in bulk at discount prices will keep you shooting long after the less savvy shooters have gone home. Following is a list of rounds that will serve you well, offering reliability and accuracy at a fair price.

When it comes to range training, choosing the best ammo should be relatively easy. The first thing that shooters tend to look for aside from the appropriate cartridge is the price. It’s easy to shoot through hundreds or thousands of rounds in a short time. Buying in bulk at discount prices will keep you shooting long after the less savvy shooters have gone home. Following is a list of rounds that will serve you well, offering reliability and accuracy at a fair price.

CCI Ammunition: 95 Grain Full Metal Jacket

Blazer is gaining a solid reputation for use in range training due to its reliability and affordability. CCI designed this ammo for the range as it’s ideal for shooting paper targets. The cartridge is constructed using brass casing and is Boxer-primed.

Specifications:

  • 945 FPS Muzzle Velocity
  • 95 Grain
  • FMJ Bullet
  • Brass Casing
  • Boxer Primer
  • 188 ft-lbs Muzzle Energy

Federal Ammunition: American Eagle Ammo 95 Grain Full Metal Jacket

The Federal American Eagle brand is well-trusted among firearms enthusiasts. The brand is known to be well-made, offering reliability, durability, and accuracy on and off the range. Brass construction and Boxer priming make it easily reloadable to enhance the savings.

Specifications:

  • 980 FPS Muzzle Velocity
  • 95 Grain
  • FMJ Bullet
  • Brass Casing
  • Boxer Primer
  • 203 ft-lbs Muzzle Energy

Winchester Ammunition: Silver Tip 95 Grain Jacketed Hollow Point

Winchester is a top name with firearms enthusiasts due to its value and consistent performance. Buying in bulk keeps the price down, and because it’s reloadable, it’s the ideal .380 ACP ammo for the range.

Specifications:

  • 1000 FPS Muzzle Velocity
  • 85 Grain
  • JHP Bullet
  • Brass Casing
  • Boxer Primer

Sellier & Bellot Ammunition: 92 Grain Full Metal Jacket

Recently acquired by the same company that produces Magtech ammo, Sellier & Bellot continue to make .380 auto ammunition using high-quality components. Their FMJ cartridges are a top choice among law enforcement agencies, hunters, and competitive shooters.

Specifications:

  • 955 FPS Muzzle Velocity
  • 92 Grain
  • FMJ Bullet
  • Brass Casing
  • Boxer Primer
  • 186 ft-lbs Muzzle Energy

SIG Sauer Ammunition: Elite V-Crown 90 Grain Jacketed Hollow Point

SIG Sauer shines with Elite Performance Ammunition. SIG V-Crown ammo offers superior weight retention, optimal penetration depth, and maximum expansion. SIG’smodern manufacturing processes give shooters a highly reliable round, improved feeding, and ultimate expansion.

Specifications:

  • 980 FPS Muzzle Velocity
  • 90 Grain
  • JHP Bullet
  • Brass Casing
  • Boxer Primer
  • 192 ft-lbs Muzzle Energy

.380 ACP Self-Defense

Best .380 ACP Self-Defense Ammo

Many people looking for a pocket gun and holster for concealed carry, look toward the .380 ACP for its weight and size. It makes enough of an impact to stop the threat, animal, or human, yet not weigh you down. Some argue that the most critical factor in self-defense ammo is achieving hydrostatic shock. Any round that is unable to deliver immediate stopping power isn’t worth its salt. The truth is that almost no handgun has the capability of offering hydrostatic shock. To do so, the muzzle velocity must exceed 2,000 FPS. Not many can do that. Instead, look for other aspects that fit your needs. See below for the best .380 ammo for self-defense.

Lots of opinions exist on the perfect self-defense ammo for a .380. However, it’s difficult to argue the testing requirement each round goes through. Set up by the FBI, most ballistics testing runs through a checklist of important factors. While the average Joe doesn’t need FBI-ready rounds, manufacturers want to ensure that their ammo is ready just in case the FBI comes calling. Here are the following characteristics of a good load:

  1. Sufficient penetration. A self-defense round needs enough penetration to do the job. The standard requires a MINIMUM of 12 inches of penetration of ballistic gel or soft tissue. That is enough power to pass through skin, bone, muscle, and fat to reach vital organs.
  2. Over penetration. A round shouldn’t deliver more than 18 inches of penetration of soft tissue. Over penetration can exit the attacker’s body, leading to a danger of collateral damage as well as not doing its job as a through and though shot.
  3. Big bullets are good. Big bullets make big holes. Big holes destroy more tissue and vital organs, stopping the threat in its tracks. Choose expanding bullets, like hollow points, to cause maximum damage and prevent over penetration.
  4. Sharp bullets work best. Expanding bullets with sharp petals cut through vital organs and arteries better than round-nose ammo. This factor causes hollow point bullets to outshine round-nosed FMJ rounds in most cases.

Our Top Picks for .380 ACP Self-Defense Ammo: 

PMC Ammunition: Bronze Ammo 90 Grain Full Metal Jacket

PMC Bronze 380 ACPPMC (Precision Made Cartridges) bronze cartridges are popular due to their affordability and consistency. This self-defense round provides an excellent feeding system to prevent jamming and failures. Rounds remain uniform due to in-house manufacturing and quality control. This 90-grain FMJ features brass casing and Boxer style priming allow for reloading up to five times.

Specifications:

  • 961 FPS Muzzle Velocity
  • 90 Grain
  • FMJ Bullet
  • Brass Casing
  • Boxer Primer
  • 185 ft-lbs Muzzle Energy

Federal Ammunition: Premium Hydra-Shok 95 Grain Jacketed Hollow Point

Federal Hydra-Shok 380 ACPFederal Premium is the company’s top seller and with good reason. Introduced in 1989, the 180-grain Federal Hydra-Shok JHP remains at the top of the list by many experts. Rigorous testing has ensured that Federal Hydra-Shok loads perform consistently and accurately.

Specifications:

  • 1000 FPS Muzzle Velocity
  • 90 Grain
  • JHP Bullet
  • Nickel-Plated Brass Casing
  • Boxer Primer
  • 200 ft-lbs Muzzle Energy

Magtech Ammunition: First Defense Guardian Gold Cartridge 85 Grain Jacketed Hollow Point

Magtech First Defense Guardian Gold is a jacketed hollow point round. The .380 +P refers to overpressure; consider it when choosing the weapon with which you intend to use it.

Magtech has a solid reputation for manufacturing consistent and reliable rounds – exactly what you need when being confronted by a threat.

Specifications:

  • 1082 FPS Muzzle Velocity
  • 85 Grain
  • JHP Bullet
  • Brass Casing
  • Boxer Primer
  • 221 ft-lbs Muzzle Energy

Winchester Ammunition: Supreme Elite 95 Grain Bonded Jacketed Hollow Point

Shooters claim this round works well in Ruger LCP handguns, Glock 42s, Walther PPKs, and pocket pistols. Spend some time at the range with this beauty before heading out into the real world. The cartridge offers excellent bullet weight retention and maximum expansion, mushrooming to 1.5 times its original diameter. The bonded core takes on tough barriers at various ranges and faces up to even the most dangerous threats. Low flash allows for rapid-fire repeat shots in low light.

Specifications:

  • 1,000 FPS Muzzle Velocity
  • 95 Grain
  • JHP Bullet
  • Brass Casing
  • Boxer Primer
  • 211 ft-lbs Muzzle Energy

Barnes Bullets: 80 Grain Solid Copper Hollow Point 

Barnes Bullets presents its TAC-XPD line of ammunition with this 80-grain TAC-XP projectile. The cartridge turns any handgun into a beast during any critical situation. The projectile maintains almost all of its bullet weight as it enters the target and creates a massive wound channel as it mushrooms.

Specifications:

  • 990 FPS Muzzle Velocity
  • 80 Grain
  • SCHP Bullet
  • Brass Casing; Techni-crom Plating
  • Boxer Primer
  • 174 ft-lbs Muzzle Energy

Winchester Ammunition: Train and Defend 95 Grain Jacketed Hollow Point

Winchester’s Train and Defend line provides effective training and excellent defense with reduced recoil. Maximum weight retention and deep penetration combine with maximum terminal expansion to make this round a good all-around choice.

Specifications:

  • 950 FPS Muzzle Velocity
  • 95 Grain
  • JHP Bullet
  • Brass Casing
  • Boxer Primer
  • 190 ft-lbs Muzzle Energy

Best .380 ACP Ammo for Target Shooting

Federal Ammunition: Personal Defense Hydra-Shok 95 Grain Jacketed Hollow Point

Federal introduced the Personal Defense line in 1989. It remains at the top of the list for self-defense and target acquisition. Hydra-Shok ammo’s notched copper jacket gives controlled expansion. Low recoil makes it easy for beginners and novices to control while firing at a variety of targets.

Specifications:

  • 1000 FPS Muzzle Velocity
  • 90 Grain
  • JHP Bullet
  • Brass Casing
  • Boxer Primer
  • 200 ft-lbs Muzzle Energy

Remington: Golden Saber 102 Grain Jacketed Hollow Point

Remington Golden Saber 380 ACP
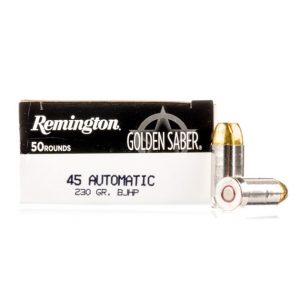
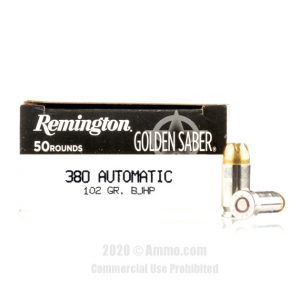
Remington’s new production, Golden Saber High Performance combines four vital elements of performance: accuracy, maximum expansion, deep penetration, and 100% weight retention. This ammunition offers low muzzle flash and reliable feeding in reloadable brass cases.

Specifications:

  • 940 FPS Muzzle Velocity
  • 90 Grain
  • JHP Bullet
  • Brass Casing
  • Boxer Primer
  • 200 ft-lbs Muzzle Energy

CCI Ammunition: Speer Gold Dot Lawman 95 Grain Total Metal Jacket

CCI’s Lawman ammo uses CCI primers and Speer Gold Dot bullets to create an economic round. This total metal jacket allows shooters to reload to save more money. Despite the low price, Lawman ammo delivers excellent, consistent performance.

Specifications:

  • 945 FPS Muzzle Velocity
  • 95 Grain
  • TMJ Bullet
  • Brass Casing
  • Boxer Primer
  • 188 ft-lbs Muzzle Energy

Hornady Ammunition: Critical Defense® 90 Grain FTX Jacketed Hollow Point

Hornady Critical Defense® outshines other hollow points with Flex Tip® technology. Hornady uses the same tip featured in  LEVERevolution® ammunition to eliminate clogging and inconsistent firing. Low flash propellants preserve vision in low light situations. Reliable terminal performance delivers each time.

Specifications:

  • 1000 FPS Muzzle Velocity
  • 90 Grain
  • JHP Bullet
  • Brass Casing
  • Boxer Primer
  • 200 ft-lbs Muzzle Energy

The Best .45 ACP Ammo For Self-Defense, Target Shooting, and More

45 ACP Self-Defense and Range Training

The .45 ACP is the most iconic round in American history. Colt introduced the pistol and ammunition in 1905. John Moses Browning, legendary firearms designer, developed the model at the request of the U.S. military. The military had complained that their present round – the .38 Long Colt – was not sufficient. It lacked penetration and stopping power. Colt presented the round to the military and it was put through a series of field tests alongside a similar round from Savage. The Colt ammunition performed brilliantly throughout 6,000 rounds in various conditions. The Savage round ran a very close second, but Colt won the day. It was adopted as standard issue for Colt’s M1911. The ammo’s stopping power made it an instant favorite of the U.S. Cavalry, and it was soon taken on by the U.S. Army.

Firearms experts say the M1911 was the main reason the .45 ACP cartridge became popular with military, law enforcement, and civilians. The gun was carried by many military heroes, including WWI legend Sergeant Alvin York. The Tennessee-born sergeant is one of the most decorated Army soldiers in American history. He received the Medal of Honor for heading an attack on a German facility, killing 25 enemy soldiers and capturing as many as 132.

The ammo continued to be popular throughout and after WWI and WWII. It was commonly used in Vietnam, chambered in the Thompson sub-machine gun.

In 1985, the U.S. military replaced the .45 ACP with the 9mm Parabellum. However, certain military members, including Delta Force, Marine Expeditionary Units, and United States Special Operations units are given the choice of using guns chambered in .45 ACP.


Table of Contents:

.45 ACP Self-Defense Ammo

Jacket Types

The most common .45 ACP round uses a 230-grain lead bullet which sits in a tapered case. Other weights are available, including 165-grain up to 255-grain.

The .45 ACP round uses two basic bullet types – Full Metal Jacket (FMJ) and Jacketed Hollow Point (JHP).


Full Metal Jacket

The FMJ is a bullet that is completely encased in a copper jacket. The style was popular with the military for full auto weapons, solving the problem of lead bullets that often misfired or jammed. The .45 FMJ is popular among civilians for target shooting, practice, plinking, and competition. The FMJ is not recommended for self-defense.


Jacketed Hollow Point

The JHP ranges in weight from 165 to 255 grains. The bullet has a lead core encased in copper. The JHP differs from the FMJ because its nose is uncovered, exposing a soft lead tip. This feature allows the round to expand upon impact. Although JHP rounds falter when hitting solid targets, they are still preferred as self-defense rounds.


Cost, Availability, and Accuracy

Ammo for a .45 is popular so it is affordable and easy to obtain. The cartridges can be ordered online or purchased at retail outlets. Below are examples of .45 rounds and their average cost.


Magtech FMC

Magtech Ammo

Magtech has plants in Czech Republic, Brazil, Germany, and the U.S. It manufactures over 1.5 billion rounds of centerfire ammunition per year. This .45 round has good ballistics, with a muzzle velocity of 840 fps.

Cost: 28.5¢ p/r


Blazer Brass

Blazer Brass

Blazer Brass .45 ACP ammo is made by CCI/ATK. The reloadable round has a muzzle velocity of 845 fps with a slightly sharper recoil impulse.

Cost: 31.5¢ p/r


Federal American Eagle

Federal American Eagle

Federal’s “American Eagle” brand has a good reputation for making solid, high performance ammunition. Its FMJ round has a higher muzzle velocity of 890 fps.

Cost: 30.0¢ p/r


Federal LE Tactical Bonded

Federal created its LE Tactical Bonded .45 ACP for law enforcement use. It has a bonded-core bullet with a muzzle velocity of 840 fps.

Cost: 66.5¢ p/r


Speer Gold Dot 230 Grain JHP

Speer Gold Dot

Speer created one of the first .45 JHP bullets to be used by many law enforcement agencies. Police often used it as standard issue for Sig P227 handguns.

Cost: $1.33 p/r


Federal Classic Hydra – Shok Personal Defense

The Federal Hydra-Shok is made with a central lead post which helps with expansion. The ammo was launched in 1988 at the request of the FBI.

Cost: 44¢ p/r


Hornady Critical Defense FTX

This lead-core JHP bullet uses additional metal in the core, which is unusual. The bullet’s core is secured to the jacket through Hornady’s InterLock groove, which helps it to keep its structural integrity when a target is hit.

Cost: $1.08 p/r


Remington Golden Saber

Remington Golden Saber

The Remington Golden Saber uses a bonded for maximum terminal performance. Its specs fit perfectly into FBI protocol and offers excellent penetration and expansion.

Cost: 50¢ p/r


Winchester Supreme Elite PDX-1

The Winchester PDX-1 uses a Winchester Ranger Bonded bullet. The bottom of the bullet shows exposed lead. The ammo offers superior expansion and penetration that exceeds FBI protocol.

Cost: $1.20 p/r


Bullet Weight

Bullet weights of .45 ACP ammo range from 165-grains to 255-grains. The performance level depends upon the shooter and the desired use. However, it is important to compare and match bullet weights as closely as possible if you intend to use different weights for different purposes. For example, if you plan to use .45 ammo to target shoot or plink as well as carry, then switching weights can cause issues with aim and recoil. Differences are minor, but it may be crucial during a competition or in a home defense situation. Additionally, changing bullet weights may affect your sight adjustment.


Best 45 ACP Ammo for Self-Defense

Using a .45 handgun for self-defense ensures that the target will be stopped. However, it requires skill. A .45 has deep penetration and maximum stopping power, which means that novices stand a chance of creating collateral damage if fired in the home. It is important to note that self-defense or home defense does not necessarily mean killing a target. It could be a way to stay safe while scaring away an intruder, whether its human or animal. As a concealed carry, a .45 may be difficult for some shooters to draw when needed.

Top picks for self-defense rounds:


Hornady Custom XTP

The Hornady XTP bullet has a hollow point cavity and a scored jacket, which aids in expansion. Hornady also offers a +P version with a muzzle velocity of 1055 fps. Experts consider this round to be excellent for self-defense and home protection.


Speer LE Gold Dot 45 ACP 230 Grain JHP

Speer Gold Dot

Speer creates high-performance rounds for personal protection. This JHP provides consistent shot-to-shot expansion, with high accuracy and reliable results.


Federal Personal Defense 230 Grain JHP

Federal

Federal makes a 230 grain jacketed hollow point (JHP). Experts often call it the best large caliber for self-defense for precision, accuracy, and penetration.


Hornady Duty Defense 220 Grain FTX JHP

Hornady manufactures this 220-grain, .45 ACP ammo. The +P ammo has precision, accuracy, and penetration with maximum expansion.


Speer Gold Dot JHP 230 Grain JHP

This 230-grain JHP is accurate, fires controlled penetration, and delivers superior stopping power.


Best .45 ACP Ammo for Law Enforcement

The .45 ACP was created for the military and law enforcement. While many police departments have changed to 9mm rounds, some still prefer to use a .45 for its penetration of hard targets. It also provides the necessary stopping power the officers need. Although some departments carry 9mm sidearms, it is not unusual to find members of law enforcement that still carry a .45 as a sidearm or an off-duty service weapon.

Popular rounds include:   


Winchester 45 Auto 230 Grain JHP Ranger Bonded

Winchester

Ranger® Bonded 45 ACP Ammunition was made to deliver maximum penetration through hard and abrasive barriers, including auto glass. The round is effective due to Winchester’s core/jacket bonding process. This ammo is popular with law enforcement as a service round.


Winchester 45 ACP +P 175 Grain Ranger Frangible SF

Ranger® Frangible is made for shooting in close quarters. It uses lead-free-powdered metal projectiles to deliver excellent frangibility against hard targets. The round also has reduced ricochet which helps with specific and accurate training exercises.


Winchester 45 Auto 230 Grain JHP Ranger T-Series 

The Ranger® T Series ammunition has superior expansion and deep penetration enhanced by the engineered segments used in Winchester’s patented SXT® design. It delivers consistent stopping power when it is needed most. The ammo is also available in a +P version.


Hornady .45 Auto +P 220 Grain Critical Duty

Critical Duty

Critical Duty is the cream of the crop for tactical and law enforcement professionals. The Flex Tip® design eliminates clogging and assists bullet expansion. Its jacket-to-core InterLock® band keeps the bullet and core from separating, giving superior expansion, maximum weight retention, and consistent penetration.


Best .45 ACP Ammo for Target Practice & Range Training

Competition shooters, plinkers and trainers demand ammo that fires clean with high reliability and accuracy. Indoor or outdoor, .45 ACP ammo works well as target ammo whether you’re in for range training or gearing up for your next match. Here are some popular brands:


Winchester Service Grade 45 ACP 230 Grain FMJ 

Winchester

Winchester Service Grade is a workhorse ammo. It is reliable and clean-burning target ammo.


Federal American Eagle Non-Toxic Primer 45 ACP 230 Grain TMJ

Federal American Eagle

Federal’s non-toxic TMJ bullet is made for indoor range practice. The rounds are not fully jacketed and are loaded with primers free of toxic metals.


Federal American Eagle 230 Grain FMJ

Federal makes a reloadable 230-grain FMJ ideal for practice shooting and plinking purposes. This new round is similar to Federal’s Premium Personal Defense rounds.


Best 45 ACP Ammo for Hunting

Seasoned shooters have an ongoing argument on handgun hunting. Some say you shouldn’t do it unless your main gun misfires. Others say it’s fine as long as you know what you’re doing. Although they will never see eye to eye (especially holding Grandpappy’s 30-06), these rounds may make it a bit easier to choose.

Hunters pick Federal, Hornady, Remington, Speer and Winchester ammo more than any other. You can buy ammo online to save money. You’ll be able to build up stock and get ammo for every type of prey from whitetail to elk to bear.

Top Picks:


Hornady® Superformance™ Rifle Ammunition

Hornady uses a powder blend that gives an additional 200 fps from a Superformance round. It results in reduced wind drift, flatter trajectory, and superior accuracy.


Remington® Premier® Core-Lokt® Ultra Ammunition

Premier Core-Lokt ammunition does against large game. It retains 95 percent of its weight and gives expansion twice the original diameter. Terminal performance up to 500 yards.


Nosler Partition

Nosler is a solid all-around bullet. It loses some points for accuracy but gives high terminal performance.


Federal Premium Trophy Bonded Tip Rifle Ammunition

Vital-Shok line was designed after the Trophy Bonded Bear Claw® cartridge. It has higher performance and downrange accuracy.


Deer Hunting

Deer Hunting

Deer are the most hunted game animals in North America. The deer population was in danger in the early 20th century due to lax regulations, but today they number about 30 million. The season starts in August and runs through January (depending where you are). They are hunted mostly in the eastern U.S. although they are also seen west of the Rockies.

Deer can be difficult to kill with .45 ammo unless you’re a crack shot. They’re fast and require exact placement before they’ll go down. The most sought after rounds include

Browning’s BXR, Winchester’s Deer Season XP, Nosler’s Ballistic Tips, Hornady’s American Whitetail, Hornady’s SST, Browning’s BXR, and Federal’s Non-Typical ammo.


Hog Hunting


People often misunderstand the tenacity and strength of hogs – particularly if they are feral. Brought over from Spain in the 1500s, wild hogs escaped from their encampments and ran rampant throughout the U.S. They became invasive and destructive animals that are hard to kill. Their thick skins and bulk require ammo with deep penetration. Bonded rounds have the most effect against wild hogs. Top notch ammo includes Hornady’s Interbond, Nosler’s Accubond, Federal’s Trophy Bonded Tip, Hornady GMX, Browning’s BXC, and Federal’s Trophy Copper ammunition.


Bear Hunting & Protection

Bear Hunting

Most hunters say that hunting bear with a handgun is asking for trouble. Of course, it depends on the ammo and the size of the bear. Bear aren’t easy to kill with a handgun, but it can be done – if the placement is right. Experts say that you’d have to make a direct hit to the heart or through the eye. Perhaps that’s why most hunters opt for a more powerful weapon and keep the .45 as a backup weapon. Bears don’t attack without reason but getting close enough to shoot his eye out is a dangerous proposition. Remember that a bear is a creature with thick skin, dense flesh and a great deal of fat. Stories of mama bears charging people on her turf are legendary. If that happens, any gun you choose may not be enough to save you. Arguments aside, most experts say that if you are going to hunt bear with a .45, your ammo should be at least 230-grains. Penetration is key.

If you are hunting with .45 ACP, consider these choices for ammo:


.45 Colt Buffalo Bore 255 Grain SWC

This standard-pressure semi-wadcutter (SWC) round mirrors the traditional 255-grain SWC load. Known for high accuracy, this round delivers deep penetration. The only downside is a strong recoil.

  • Bullet Weight: 255 Grain
  •  Muzzle Energy: 566 ft lbs
  •  Muzzle Velocity: 1000 fps
  •  Casing Material: Brass


 .45 ACP Fiocchi 230 Grain FMJ

Fiocchi Ammunition

This Fiocchi round gives excellent performance for a high volume shooter and hunter. It is an affordable, highly accurate round with excellent consistency.

  • Bullet Type: Full Metal Jacket (FMJ)
  • Bullet Weight: 230 Grain
  • Muzzle Energy: 377 ft lbs
  •  Muzzle Velocity: 860 fps
  •  Casing Material: Brass


.45 Federal 230 Grain FMJ

Federal offers a 230-grain FMJ with deep penetration, high accuracy and reliable expansion. It has a non-magnetic lead core full metal jacket and uses noncorrosive Boxer primer.

  • Bullet Type: Full Metal Jacket (FMJ)
  • Bullet Weight: 230 Grain
  • Muzzle Energy: 404 ft lbs
  •  Muzzle Velocity: 890 fps
  •  Casing Material: Brass


Conclusion

.45 ACP ammunition has been around for more than 100 years. Seasoned shooters, pros, and newbies alike covet it for its status, power, and versatility. In the right hands, it is an all-around cartridge that will serve you well – at the range, in the woods, in the backyard or at your local indoor range.

The Best 10mm Ammo For Self-Defense, Range Training, and More

10mm Ammo

The 10mm cartridge was designed in 1983 by Lieutenant Colonel Jeff Cooper who worked with various agencies and companies including Norma, FBI, and Smith & Wesson. Cooper, a firearms expert, set out to replace the .45 ACP. In doing so, he created a round that has a better transfer of energy and flatter trajectory in a cartridge small enough to be used in a semi-automatic pistol. The 10mm is generally heavier than the 9mm with an average of 135-200 grains. Hollow points are the most common style.

After the 1986 Miami shootout in which two FBI special agents were killed and 5 were wounded, the agency reevaluated their need for a stronger caliber. The 10mm was tested and approved as standard issue for agents. However, during field trials, the ammo was found to have too much recoil for the average agent, so the power had to be reduced. While the introduction of the .40 S&W heralded the end of the 10mm in many circles, it still remains popular today. It is used by Special Weapons and Tactics (SWAT) Teams, the FBI Hostage Rescue Team (HRT), and other law enforcement agencies. Currently, the 10mm auto is used mainly for hunting, range training, plinking, personal and home defense, and tactical use.

Best 10mm Self-Defense Ammo

Self-defense ammo uses several benchmarks to determine usability and effectiveness. When choosing a handgun ammunition for personal defense, important factors include bullet expansion, maximum penetration, manageable recoil, reliability, and bullet weight. Due to the power of a 10mm round, it is advised to use only hollow point bullets.

The best ammo for self-defense includes:

Federal Ammunition: 180 Grain JHP

Iconic brand Federal Ammunition produces this 10mm round that’s fairly similar to Hornady. The velocity and muzzle energy are only slightly less, and the price is comparable.

Specifications:

  • 1030 FPS Muzzle Velocity
  • 180 Grain
  • Jacketed Hollow Point Bullet
  • Nickel-Plated Brass Casing
  • Boxer Primer
  • 424 ft-lbs. Muzzle Energy

Federal Ammunition: 180 Grain Hydra-SHOK JHP

Federal Premium is the company’s top seller, and with good reason. The 180 Grain Hydra-SHOK JHP was introduced in 1989 and has remained at the top of the list by many experts as the best 10mm ammunition on the market. Rigorous testing has ensured that Hydra-SHOK loads perform consistently and accurately.

Specifications:

  • 1030 FPS Muzzle Velocity
  • 180 Grain
  • Jacketed Hollow Point Bullet
  • Nickel-Plated Brass Casing
  • Boxer Primer
  • 424 ft-lbs. Muzzle Energy

Hornady Ammunition: Custom 180 Grain JHP

When it comes to finding the best self-defense 10mm ammo, Hornady stands at the front of the line. This 180 Grain JHP bullet is made for self-defense. It carries maximum power to stop threats as well as offering excellent penetration of the target.

Convenient and easy to reload, this round has been proven to fire clean for hundreds of rounds with zero failure. Additionally, the hollow point and heavier weight provide high impact energy transfer with remarkable expansion. It is also the most affordable on our list.

Specifications:

  • 1180 FPS Muzzle Velocity
  • 180 Grain
  • Jacketed Hollow Point Bullet
  • Brass Casing
  • Boxer Primer
  • 556 ft-lbs. Muzzle Energy

Hornady Ammunition: Critical Duty 175 Grain FTX 

This round is noted as being the most reliable ammo on the market. Critical Duty is the first choice by many law enforcement officers and tactical professionals in addition to civilians who seek the best in personal protection.  It has two new features offered by Hornady: A Flex Tip that initiates consistent expansion, and an InterLock band which bonds the jacket and core together to prevent separation.

Specifications:

  • 1160 FPS Muzzle Velocity
  • 175 Grain
  • Jacketed Hollow Point Bullet
  • Nickel-Plated Brass Casing
  • Boxer Primer
  • 523 ft-lbs. Muzzle Energy

Winchester Ammo: 175 Grain JHP

Made for Winchester’s Personal Defense line, this Silvertip JHP is an excellent choice for self-defense. The lighter bullet offers less recoil while offering a solid impact.

Specifications:

  • 1,200 FPS Muzzle Velocity
  • 175 Grain
  • Silvertip Jacketed Hollow Point Bullet
  • Brass Casing
  • Boxer Primer
  • 649 ft-lbs. Muzzle Energy

Best 10mm Ammo for Hunting

A 10mm cartridge excels as hunting ammunition. The bullets are measured for robustness, maximum expansion, stopping power, and potential range in the field. The round is powerful enough to take down large game, including bear.

The best ammo for hunting includes:

Buffalo Bore: Heavy Outdoorsman 220 grain

When it comes to maximum power, the name Heavy Outdoorsman says it all. The 220 grain bullet is ideal for penetrating hide and bone in large game. While the round is engineered to provide minimum expansion, it still packs a big punch. The muzzle energy will allow the 10mm ammunition to penetrate even the toughest critter at 25 yards, the maximum distance recommended for a semi-auto pistol.

Specifications:

  • 1,200 FPS Muzzle Velocity
  • 220 Grain Trophy Bonded
  • Jacketed Soft Point Bullet
  • Brass Casing
  • Boxer Primer
  • 651 ft-lbs. Muzzle Energy

Federal Ammunition: 180-grain Trophy Bonded JSP

Federal introduces this new production 10mm round. Its ballistic gel test shows that it offers the power necessary for handgun hunting. Hunting big game requires controlled expansion and deep penetration to be effective. The rounds are loaded into brass casings that are ideal for reloading.

Specifications:

  • 1,275 FPS Muzzle Velocity
  • 180 Grain Trophy Bonded
  • Jacketed Soft Point Bullet
  • Brass Casing
  • Boxer Primer
  • 650 ft-lbs. Muzzle Energy

Hornady Ammunition: 180 Grain XTP

Hornady offers this 180 grain XTP as a multi-purpose pistol ammo. It’s great for self-defense, range training, and handgun hunting. The 180 grain is good for hunting small to medium-sized game. This reliable cartridge has excellent expansion, up to 60% of the original diameter.

Specifications:

  • 1,200 FPS Muzzle Velocity
  • 180 Grain XTP
  • Hollow Point Bullet
  • Brass Casing
  • Boxer Primer
  • 650 ft-lbs. Muzzle Energy

Remington Ammunition: 180 Grain UMC FMJ

Another new production round made by Remington. The 180 grain bullet is good for high volume shots. The ammo is inexpensive and also sought after for range training.

Specifications:

  • 1,150 FPS Muzzle Velocity
  • 180 Grain
  • Full Metal Jacket Bullet
  • Nickel-plated Brass Casing
  • Boxer Primer
  • 529 ft-lbs. Muzzle Energy

Sig Sauer: V-Crown 180 Grain JHP

SIG V-Crown ammunition offers maximum stopping power. Its V-shaped main cavity is on top of a deep narrow trail giving maximum expansion, deep penetration, and superior weight retention. Reliability and dependability are optimal.

Specifications:

  • 1,250 FPS Muzzle Velocity
  • 180 Grain
  • Full Metal Jacket Bullet
  • Nickel-Plated Brass Casing
  • Boxer Primer
  • 624 ft-lbs. Muzzle Energy

Underwood Ammo: 150 Grain Xtreme Hunter

Underwood refers to 150 grain Xtreme Hunter (XH) as the ultimate hunting round. It is new production from the popular Xtreme Defender line. The copper body and optimized nose flute helps the lightweight ammo reach maximum penetration. It has an expansion rate of 100% and permanent wound cavity. The 150 grain bullet makes it easier to fire with minimal recoil. It’s an excellent round for reloading.

Specifications:

  • 1,425 FPS Muzzle Velocity
  • 150 Grain
  • Hollow Point Bullet
  • Brass Casing
  • Boxer Primer
  • 677 ft-lbs. Muzzle Energy

Best 10mm Ammo for Range Training

Federal Ammunition: 180 Grain FMJ

You can never go wrong with Federal Ammo. Slightly more expensive than other brands, this round performs consistently and accurately every time. A great range training ammo.

Specifications:

  • 1,030 FPS Muzzle Velocity
  • 180 Grain
  • Full Metal Jacket Bullet
  • Brass Casing
  • Boxer Primer
  • 424 ft-lbs. Muzzle Energy

Prvi Partizan Ammunition: 170 Grain FPJ

Founded in 1928, Prvi Partizan is a Serbian company that supplies ammunition to the country’s law enforcement and military in addition to the general public across Europe and the U.S. Their 10mm cartridge is a flat point jacketed bullet, designed to leave clean holes in your targets. The company specializes in using easily reloadable brass casings which enhances its affordability.

Specifications:

  • 1,115 FPS Muzzle Velocity
  • 170 Grain
  • Full Metal Jacket Bullet
  • Brass Casing
  • Boxer Primer
  • 469 ft-lbs. Muzzle Energy

PMC Ammunition: 200 Grain FMJ-TC

This round is surprisingly affordable considering the extra weight. Be prepared for it to pack one serious punch!

Specifications:

  • 1,050 FPS Muzzle Velocity
  • 200 Grain
  • Full Metal Jacket Bullet – Truncated Cone
  • Brass Casing
  • Boxer Primer
  • 490 ft-lbs. Muzzle Energy

Remington Ammunition: 180 Grain MC

Coming in at about the same price as the Prvi Partizan round, Remington’s 180 grain 10mm ammunition is ideal for the range, offering traditional Remington accuracy and affordability.

Specifications:

  • 1,150 FPS Muzzle Velocity
  • 180 Grain
  • Full Metal Jacket Bullet
  • Nickel-Plated Brass Casing
  • Boxer Primer
  • 529 ft-lbs. Muzzle Energy

Best 10mm Ammo for Plinking

Armscor: 180 Grain FMJ

This reloadable round was created for military and law enforcement. It has become a favorite with hobbyists and competition shooters.

Specifications:

  • 1,150 FPS Muzzle Velocity
  • 180 Grain
  • Full Metal Jacket Bullet
  • Brass Casing
  • Boxer Primer
  • 529 ft-lbs. Muzzle Energy

CCI Blazer: 200 Grain FMJ Ammunition

CCI’s 10mm Auto ammunition is a top choice for range training and plinking. The round was created to be a cheaper alternative to more expensive rounds; the aluminum casing keeps the price low. It also means that it can’t be reloaded.

Specifications:

  • 1,050 FPS Muzzle Velocity
  • 200 Grain
  • Full Metal Jacket Bullet
  • Aluminum Casing
  • Boxer Primer
  • 490 ft-lbs. Muzzle Energy

Federal Ammunition: 180 Grain FMJ

Federal makes a 10mm ammunition that’s easy and fun to shoot. The lower muzzle energy reduces the recoil of more powerful rounds while still delivering reliability and accuracy. Stock up for a day in the back yard or at the range.

Specifications:

  • 1,030 FPS Muzzle Velocity
  • 180 Grain
  • Full Metal Jacket Bullet
  • Brass Casing
  • Boxer Primer
  • 424 ft-lbs. Muzzle Energy

Magtech: 180 Grain FMJ

Magtech’s answer to the perfect plinking round is their 180 grain auto ammo from the Sport line. The company is known for manufacturing high quality ammunition that offers dependability and precision. It is often the top choice for plinkers and competitors.

Specifications:

  • 1,230 FPS Muzzle Velocity
  • 180 Grain
  • Full Metal Jacket Bullet
  • Brass Casing
  • Boxer Primer
  • 605 ft-lbs. Muzzle Energy

Remington Ammunition: 180-grain UMC FMJ

Another new production round made by Remington. The 180 grain bullet is good for high volume shots. The ammo is inexpensive and also sought after for range training.

Specifications:

  • 1,150 FPS Muzzle Velocity
  • 180 Grain
  • Full Metal Jacket Bullet
  • Nickel-plated Brass Casing
  • Boxer Primer
  • 529 ft-lbs. Muzzle Energy

Sellier & Bellot: 180 Grain FMJ Ammunition

A 180 grain round is average for 10mm auto ammo. This inexpensive training ammo serves as an excellent plinking round due to its reduced recoil. S&B use a copper jacket to reduce fouling; the sloped body and flat nose increase reliability and smooth feeding.

Specifications:

  • 1,164 FPS Muzzle Velocity
  • 180 Grain
  • Full Metal Jacket Bullet
  • Brass Casing
  • Boxer Primer
  • 543 ft-lbs. Muzzle Energy

Conclusion

While 10mm ammunition has waned in popularity over the last couple decades, it is still a good all-round choice for the hunter, hobbyist, and competitive shooter. When it comes to self-defense, 10mm packs a powerful punch with less chance of collateral damage than other big bore ammo. Buying in bulk makes this load even less expensive, yet the shooter can still count on accuracy, dependability and stopping power.

Glock vs. 1911

Glock fans seem obsessed with comparing their pistols to the 1911, with the overall thrust of the argument being an attempt to prove that the Glock is superior to the 1911 in every way. They will most often point to reliability, durability, capacity, weight, and the simplicity of the Glock design to demonstrate the point. My biases are as follows: I’m a 1911 fanatic and I’m not wild about Glocks. But is the Glock superior to the 1911? The two systems are so different that I have questions about the validity of any comparison beyond the fact that they’re both pistols and choices need to be made. Here are some areas of comparison which lead me to prefer the 1911-pattern guns:

Reliability – I have seen more feed failures on 1911-pattern guns than I have with Glocks (or Smith & Wessons and Berettas, for that matter). My personal 1911’s, a Springfield and a Kimber, don’t experience feed failures, although the Springfield did have a couple when it was new. At a recent IDPA match, I witnessed a Les Baer Custom and Colt Gold Cup experience failure to feed. The original mil-spec 1911A1 is a very reliable gun when using the mil-spec ammo around which it was designed, and contemporary 1911’s which are properly throated and broken in are also extremely reliable. The original 1911’s which were issued to the Army were built with very liberal tolerances–you could call them loose–because the Army valued reliability under adverse conditions above pinpoint accuracy. Many of the feed reliability problems with 1911 pistols arise from efforts to tighten up the frame, slide, barrel and bushing in order to achieve “match grade” accuracy. Glocks don’t tend to suffer feed failures, but in order to achieve this reliability, they have more of their chambers cut away, leaving more of the case unsupported. This design feature has led to some blown Glock .40 S&W pistols. For more on this, see Dean Speir’s Glock KaBoom FAQ. One reliability issue which I’ve seen more with Glocks than other pistols is their occasional failure to detonate primers. While Glock advocates will say that other pistols have the same problem, I’ve only seen it happen on Glocks. While Glock true-believers are driven to proclaim their guns as the ultimate in reliability, the NYPD has been experiencing extractor problems and double feeds on their Glock 9mms.

The Eye of the Beholder – I am one of those people for whom the appearance of a gun matters. I like beautiful guns made of high grade metals with fine finishes. I don’t like black plastic. To me, the Glock is one of the ugliest designs every conceived by the mind of man. Although some custom finishes can be applied to the slide, the options for dressing up the Glock are very limited. In contrast, 1911-pattern guns can accept a wide variety of finishes, grip panels, custom components, engraving, and other modifications which enhance the appearance of the gun. Glocks are made by one manufacturer whereas 1911-pattern guns have been made by scores of manufacturers since World War I, adding a great deal of interest, variety, and individuality to the type.

Uniformity vs. Individuality – With 1911’s you deal with a particular gun, the one you’re holding at that moment. Glocks are, for the most part, homogenous within model types. Each 1911 has a personality of its own, even among examples of the same model and production run from the same manufacturer. Whether this annoys or delights is a matter of personal preference. Those who like personality and individuality in a pistol will find the Glock uninteresting, and those who value absolute consistency will find their confidence undermined by a fussy 1911 which refuses to feed their favorite load. Any new-in-the-box 1911 is really a custom kit. The 1911 is to handguns what the `57 Chevy is to hotrods or the P-51 Mustang to air racers, the ultimate platform for customization. Pistoleros inclined to tinkering eventually find their way to the 1911. Aftermarket parts abound for this pistol, and you can make it into almost anything your heart desires. The design requirements for the pistol specified a gun which could be serviced in the field with a minimum number of tools, and it can be completely disassembled using only its own parts. Consequently, the 1911 is very accessible from a mechanical point of view. It is relatively easy to install custom parts or modify existing ones. Few 1911s remain completely stock for very long, unless they are those models which include the custom features usually added to the mil-spec guns, such as extended beavertails, custom triggers and hammers, full length guide rods, and decorative grips. For those who seek a personalized sidearm, the 1911 is one of the best platforms from which to begin.

Durability – I have heard claims that Glocks have launched as many as 300,000 rounds from a single pistol without a failure. I’ve never seen any documentation which would substantiate these claims, and I remain a bit skeptical about it. I’d like to see the gun, the round, and the test conditions. The FBI tests did document 50,000 rounds through the Glock .40 S&W without a breakdown, and that’s an impressive performance. The original Army endurance test for the 1911 was 6,000 rounds. A well-built 1911 can be expected to have a service life of 150,000 rounds, although a part may break here or there during its lifetime. Only time will tell if the first Glocks will still be serviceable seventy five years from now. We know that many of the early 1911’s are still functional and greatly desired by collectors.

Accuracy – In my opinion, an average government model 1911 is likely to be more accurate than the best Glock. In addition to that, 1911’s can be tuned for greater accuracy whereas the Glock can’t be. Between a really outstanding match grade 1911 and a Glock there is no contest in terms of accuracy. Glocks have acceptable accuracy for their intended mission, that being close range combat, but they are not tack-drivers. I haven’t had opportunity to test one of the new long slide Glocks, but my initial impression is that they are an answer in search of a question.

Trigger – The one thing the Glock and the 1911 have in common is that their triggers are their greatest strength and weakness. The “revolutionary” design of the Glock centers on the trigger, the so-called “Safe Action Trigger.” The Glock pre-cocks with the cycling of the slide so it can have a much lighter trigger than a true double action gun. In order to increase safety, the Glock was given a very long trigger pull and a little safety flange on the trigger which supposedly functions as a safety–if it isn’t depressed the gun won’t go off. But given the fact that it’s on the trigger, it strikes me as largely superfluous. Aside from this, there are no external safeties on the Glock. If the trigger is pulled, the gun will go off, period. Personally, I find the Glock “Safe Action” scary, and lacking in the backup safety features that I prefer to see on an autoloader. Fans of the “Safe Action” point to the fact that there are no levers with which to fumble in a crisis and compare the Glock to a double action revolver (although very few revolvers have 3 lb. double action triggers). For a combat gun, these are valid points–simplicity translates into speed and keeps Murphy at bay, and light triggers give greater accuracy.

The single action trigger of the 1911 is light, crisp, and short. Since little muscle action is required to break the trigger, trigger control is less of a problem on the 1911 than any double action or “Safe Action” system. Since the trigger pull is so short, rapid fire is easy and fast. And then there’s the dark side: for a single action 1911 to be ready for action, it must be carried “cocked and locked,” which means hammer cocked and and manual safety on. More than anything else, this looks scary. People have come up with several strategies to avoid the cock and lock, also known as “Condition One.” There is the “Israeli Draw” which means the pistol is carried with an empty chamber and charged magazine (“Condition Three“), and is drawn and the slide racked as the gun comes up to fire. Some choose to carry with the hammer down with a round in the chamber (Condition Two). Condition Two is just a bad idea for several reasons, but all of them have to do with the gun going off when you don’t expect it to. Some choose simply not to carry the 1911 at all due to their discomfort with Condition One.

In my opinion, the Glock carries in Condition Zero, that is, hammer cocked with no real external safety applied. I don’t acknowledge the trigger flange to be a fully functional external safety, and the number of accidental discharges reported on the Glocks tends to bear this out.

My own preference is for the 1911 trigger with its double safety system (manual thumb safety and grip safety). Even if one were to forget to apply the manual safety, the grip safety must be depressed and the trigger pulled for the gun to fire. With that said, the 1911 requires training and practice to be a safe and effective personal defense weapon. The Glock trigger seems long and mushy, and since there are no external safeties other than the trigger flange, it strikes me as being more prone to accidental discharge than the 1911. For target and competitive shooting, the 1911 trigger is my favorite.

Weight and Capacity – In this category, the Glock has the clear advantage. The Glock with its polymer frame is lighter and uses double stack magazines. Even the compact Glock 30 carries 10 rounds in its magazine. Compact 1911’s such as the Colt Officer’s model and the Kimber Compact can carry seven in the magazine. Government models can carry eight rounds or ten with an aftermarket magazine which extends beyond the base of the grip. A number of manufacturers such as Para-Ordnance, Springfield, and Kimber have introduced “widebody” 1911-pattern guns which can accept 10-14 round double stack magazines. To me, a true 1911 is a single stack gun. One of the strongest features of the 1911 is that wonderful, single stack grip.

Touchy-Feely – One of the greatest features of the 1911 is the narrow grip and short trigger configuration of the pistol. The grip of the 1911 remains the best feeling grip of any pistol I know of. The narrowness of the handle allows the hand to really wrap around the pistol and get a solid grip. The narrowness also benefits those with smaller hands, since the grip is narrow and the trigger relatively close to the handle. Also, within the configuration is a design feature which has been copied by the builders of most autoloaders since–the magazine release button located where the trigger guard meets the handle. Last, but very important, is the overall narrowness of the 1911 pistol which allows even the relatively large government model to be surprisingly easy to conceal. By way of contrast, Glock handles tend to be fat since they use double-stack magazine, and are more difficult to conceal due to their width. To me, a 1911 feels like a pistol ought to feel, whereas the Glock feels like a water gun.

Conclusion – Well, I warned you of my biases up front. Give me a 1911 any day. Nevertheless, the Glock design has proven to be a watershed event in the development of handguns. I really enjoy 1911’s and practice regularly with them. My mode of carry is always concealed, so I’m not in the position of scaring the public with a cocked pistol on my hip. Patrol officers who may not be gun enthusiasts or enjoy a regular practice schedule may be better served by a Glock-type pistol with its long trigger and greater capacity.

“The police establishment is now properly devoted to the Glock, and this seems to be a good choice. The Glock is a difficult piece to shoot well, and its safety problem has been solved by issuing it with a trigger that only a gorilla would love, but it has been generally admitted that the police today cannot be trained to shoot well – not so much because of time and ammunition expenditures, but because of motivation. A man will do well only at things he enjoys doing, and today’s police departments are reluctant to hire a recruit who enjoys shooting. Thus the Glock’s “shootability” is irrelevant. The piece is relatively cheap, it is usually reliable, and the company’s service policies are outstanding.”
– Jeff Cooper, Cooper Commentaries, Volume V, Number 11.

The Case for the .45 ACP

By Jim Higginbotham

The .45 ACP is not a very powerful cartridge. Now that may come as a shock to those who are thinking “if this is an argument in favor of the .45 auto then I’d hate to see the other side”. It might come as even more of a shock for those who recognize me as a vocal – if not infamous – supporter of the cartridge for self defense. I start my treatment of this subject this way because too often we tend to exaggerate a bit when developing positions in the eternal debate of which cartridge is best for a given mission.

The mission, in our case, is obvious but, never the less, must be stated. The mission of the defensive pistol is to save the life of its user – or an innocent third party he is authorized to use lethal force to protect. In more specific terms it is to end a lethal attack as expeditiously as possible. Since it takes very little time for an attacker to strike a potentially mortal blow (either with a firearm, edged weapon or blunt instrument) then it is imperative that the cartridge chambered in your sidearm be as effective as practicable – for you may not have the luxury of more than one or two shots before the blow is struck.. In truth, no handgun round is effective enough on a determined human attacker to achieve this goal unless the central nervous system is disrupted (this does not mean just hit – it means serious damage must be done to the brain or spine). Unfortunately, these targets are extremely hard to locate on a three dimensional target in a dynamic situation and are next to impossible to hit reliably. That leaves us with disabling the adversary by causing a loss of blood pressure, and thereby, depriving the brain of oxygen which brings about gradual incapacitation. While no handgun round (and few rifle rounds) are effective instantly with this type of hit, some do a better job than others. Obviously, the faster we can drop blood pressure the quicker the incapacitation. The simple fact is, the bigger the hole(s) the faster the drop in blood pressure. I cannot find any evidence of some “force” or “energy” or any other property which causes rapid incapacitation (as opposed to relatively slow incapacitation due to clinical shock) in and of itself. Of course a simple way to increase the size of the hole is to shoot again, repeatedly and often. However, in trained hands, at normal defense ranges (about 10 feet or less) a .45 Auto can be fired as fast and accurately as a .22 auto. It is more a matter of training than of caliber choice up to a point. Depending on the shooter, and to some extent the weight of the gun, somewhere about the level of the .41 or .44 Magnum full power loads we get into recoil that is unmanageable in rapid fire for most people.

I see a hand raised at the back of the room. “What about ‘hydra-static shock’?” I do not mean to sound boastful or arrogant but I have been experimenting with firearms in the hunting field for over 30 years and I have been involved in law enforcement both as an officer and a trainer for over a quarter of a century. Does that make me the ultimate expert – absolutely not! What it does mean is that I have been searching for answers to terminal ballistic questions for a long time. In that time I have shot a lot of game, interviewed a lot of folks who have been shot, have been shot myself and seen dozens of films and videos of people actually being shot. I have shot critters from 10 to 400 pounds (and witnessed bigger stuff go down) with bullets from .22 to .70 caliber and velocities in excess of 4,000 fps. I have not noticed anything consistent that I could call “hydra-static shock” other than in vermin in the 10 to 30 pound weight range and shot with fragile bullets that impacted at 3000 fps or more. I have shot larger animals with bullets that impacted at well above 3,000 fps and, while the permanent wound cavities were impressive in some cases, I have not noticed any consistent “magic” instant incapacitation when bullets did not strike the Central Nervous System (CNS) or at least hit close. If a 150 gr. Rifle bullet at 3500 fps (.300 Weatherby) will not instantly take down a deer by virtue of its “hydrostatic shock” or “kinetic energy dump” with a lung or heart shot, then what chance does a 9mm have (or a .45) at 1/3 the velocity? Having studied terminal ballistics on both game and humans I have concluded that a 200 pound deer is much easier to incapacitate than a 200 pound determined attacker (note that there are many cases of “undetermined” attackers who have been stopped by warning shots, insignificant wounds or even threats).

Some advocates of small to medium calibers usually opine that shot placement is far more important than any considerations of caliber or “power”. They are ALMOST right. The key to rapid incapacitation is, of course, what the bullet destroys. This is not exactly the same as “shot placement”. Once the bullet strikes the surface of a target “shot placement” has run its course, what the bullet actually destroys inside the body is now subject to terminal ballistic properties. The .22 long rifle solid is noted for its tendency to tumble and change course after it impacts a large target. It is quite “lethal” though it is not noted to be a “stopper”. No doubt, however, if a .22 bullet strikes the brain or the spinal cord (with enough force to damage it) rapid incapacitation would be a result. The trouble is a bullet that is placed perfectly, say on the sternum, may deflect or disintegrate and not reach the organ it was intended to destroy.

So, if what the bullet hits, and the amount of permanent damage done to vital organs is the key to stopping an attack then what is wrong with using medium bore cartridges like the 9mm or the .357 Magnum. In truth, IF one is willing to take the conservative approach with well constructed bullets which might expand a bit but will “stay the course” and penetrate to the vitals from all angles, there is little wrong with them. The trouble is that pundits and experts want to push the “shock” or “energy” properties to the maximum and that leads to light weight, fragile bullets which are less likely to penetrate to the back of the chest wall or to the spine. This does result in some spectacular wounds and in some cases of rapid incapacitation. But it also results in spectacular failures, exemplified by the failures of the 9mm silver-tip in the infamous “Miami Massacre” or the gunfight in which trooper Mark Coates shot his assailant 5 times center mass with a .357 Magnum, only to be killed with a .22 mini revolver.

Even modern technology does not completely overcome the laws of physics. This fall I shot two animals with the hot 9 X 23 cartridge. I used both the Winchester USA factory load – a 125 gr soft point at about 1525 fps from my 5″ 1911 and a handload of a Speer 124 gr. Gold Dot at just under 1600 fps. This performance is at the upper end of the scale for medium bore defense loads. These loads both expanded a little (but not like the pictures in magazines) and held their weight fairly well and both penetrated about 10″. While both hit ribs, neither hit major bone except the Gold Dot which bumped up against a leg bone on the off side with no damage, ending its travel. While neither bullet was by any means a failure neither was the damage done to the animals spectacular. Both produced holes in lung tissue about the size of your thumb. I have seen similar wounds with .45 ball bullets that tumbled (this happens in large targets as often as not).

One might logically ask “so why choose a .45 if a good 9mm produces equal wounds?” The simple answer is that, while the best (or worst depending on your point of view) 9mm wounds are about equal to the least effective .45s – and in some cases produce even larger diameter but shallower wounds – you pay for this by compromising the consistency of your cartridge performance. A 9mm hollowpoint that gives consistent 12 inch penetration in ordnance gelatin in the lab sometimes gives 8 – 10″ penetration in real flesh and blood targets and sometimes it gives 3 or 4″ penetration and I have seen as little as 1/2″ penetration with 125 gr. .38 +P jhp (and no it did not disintegrate nor glance off – it just stopped). If you happen to be shooting the one that gives 3″ penetration (and poor Mark Coates had 5 in a row with his Magnum) then it does not matter if you shoot well – you might as well be shooting spit wads.

So far we are comparing the best medium bores to the least spectacular larger bores. If you compare bullets of similar technology the larger bore shows proportional performance. A .45 230 gr. Ball round destroys about 1.7 times as much tissue as a 9mm ball round. A 230 gr. .45 jhp destroys about 1.7 time as much tissue as a 9mm 124 jhp that expands. The thing is, due to its mass the 230 grain .45 gives more consistent penetration. While it is difficult, you can make a .45 an inefficient performer. You do this by lightening the bullet and increasing the velocity. While some 185 gr. .45’s, reportedly, are well constructed and give fairly consistent penetration, some are not. I have had 185 gr. Winchester Silver-Tips fail to penetrate 8 pound ground hogs – this is not confidence inspiring.

While I have come across some lethal encounters that took a lot of rounds to settle they mostly were the result of either poor hits (or complete misses) or lack of penetration. Nearly all of the high round count cases I have reviewed involved 9mms, .38s, .357’s or smaller calibers. This is not to say they do not occur with major caliber rounds. It is to say I have been collecting data for 30 years and have not encountered many cases in which multiple hits (more than three as two or three shots are a fairly normal reflex action) from major caliber cartridges to the center of the chest have not been sufficient, – the single exception being a case involving the .41 Magnum loaded with JSP bullets which did not expand – they did penetrate – it took five hits center mass to stop the attacker – and have not encountered any with the .45, even with Ball. I have encountered several with 5, 6 or even more hits to the center of the chest with .38, .357, 9mm and .223 rifle rounds failing to stop. Almost every one could be traced to lack of penetration with a couple of exceptions that hit the heart but just did not cause enough damage to be effective quickly. Note I am not talking about “torso” hits. There is a lot of area in the torso in which a hit will seldom produce rapid incapacitation even if hit by a 12 ga. slug or a 30-06 – we simply cannot count such data if we are going to learn anything.

Please note that I am not saying you should avoid cartridge X because it has a track record of 50% “stops” and there are cartridges with better records – the information available in these data bases is simply unusable to predict what a cartridge will do in terms if incapacitation. It is thought by some analysts that in as many as 50% of recorded cases the subject stopped the fight for psychological reasons – and this is not a caliber issue – so we cannot use such data to support conclusions about power. Add to this that many data bases are polluted by inclusion of bad hits or a questionable definition of “incapacitation” and we get into very muddy water. What we can do is take note of the failures and try to figure out the cause.

So, do the medium bores lack “stopping power”, “shocking power” or what ever term you choose to use. Yes they do. So do the .45 Auto and the .44 magnum and the .223 so that is not the defining issue. The issue is that they are less likely to drive their bullet – given equal placement – through an important target with adequate damage to the organ. In short, in the popular loads, they fail to reach or damage their intended target more often than the larger calibers. To be sure there is the issue of overpenetration but I feel that it is overblown. There are so many different types of tissue and bone in the human anatomy that one cannot precisely predict how much penetration he will need nor how much he will get. We have seen where bullets that give 14″ of penetration consistently in ordnance gelatin can sometimes give 3″ in the human body. We need a good bit more margin for error than this for rounds to be effective in their mission. Personally I want rounds that give 12 to 14 inches in gelatin as a minimum, not a maximum and frankly I really want 18 inches but there are few loads with give this and expand also.

In conclusion, having a reasonable amount of experience and study I have no doubt that the larger caliber handguns are more effective that the smaller ones, given exactly the same placement of bullets on the surface of the target, but not because of some energy, force or power which bowls people over or carries some sort of “shock”. It is because they more consistently drill holes – larger holes – through the intended organs. Does that mean they are better for you. Perhaps, but if you do not shoot your weapon well it does not matter. On the other hand I have encountered cases in which people shot their medium bores well – extremely well – and still died because their bullet did not do their job. It is a dilemma of some import.

Perhaps the best advice I have heard on this matter is “shoot the biggest caliber you can handle”. My admonition is, don’t settle for less if you don’t really have to. And if you do have to, use a bullet that will drive through to the vital organs from any angle and through simple barriers (like arms). There are many other factors to selecting a defense handgun, capacity, ergonomics, reliability, accuracy, concealability and so forth (not in that order). All are at least as important as the caliber you select but remember – failure in any one area means failure to carry out the mission. What I am saying is don’t get lulled into the idea that the choice of caliber is unimportant or that a medium bore is big enough if the weapon meets all the other requirements, because …. a .45 is not big enough!

Appendix 1: Ammunition

I don’t like to give recommendations as to specific loads. The main reason for this is that manufacturers change these loads at will, especially the composition of the bullet and they do not give notice. This can greatly effect the performance of the load. Still folks like to have some idea so I will offer the following as a general guideline:

1. Loads to avoid due to inconsistent penetration: Glaser Safety Slugs, Mag-Safe or other “pre-fragmented” bullets. Winchester 185 gr Silver-Tip. While I have no experience with the Federal 165 P.D. load I suspect it is also too light to give consistent penetration if bone is hit.

2. Loads which give 12 to 14 inches of penetration and good expansion (.70 to .80 caliber): Federal 230 gr. Hydra-Shok, Winchester 230 gr. Black Talon (or newer +P Ranger), Speer Lawman 230 gr. Gold Dot, Remington 230 gr. Golden Saber. This list is not all inclusive. Not doubt there are others that will work but I have used the ones listed.

3. Observations from the hunting field – not recommendations just a general report (handloads for defense are discouraged). The Winchester 230 gr. JHP handloaded to 1040 fps is an outstanding performer on deer and wild boar giving complete penetration on broadside shots and expanding to about .77 caliber. The 200 gr. Hornady XTP will disintegrate at about 1500 fps (from a .45 Win Mag.) and loses its jacket at about 1100 fps. The Sierra 185 gr Power Jacket expands to about .90 at 1150 fps but only penetrates about 8 to 10 inches and will break up on heavy bone. 230 gr. FMJ-RN often tumbles on game in the 200 pound range giving about 14 – 18 inches of penetration. A 260 gr. Keith bullet can be loaded to 1000 fps in a 5″ .45 auto and can go lengthwise through a 200 pound deer – it is far less likely to tumble than RN.

Slide Release or Slingshot? Dropping the Slide During a Reload from Slide Lock

Syd

Q: What are your thoughts on releasing the slide after reloading from slide lock? Use the release or yank back the slide and let it drop?

A: For absolute reliability it is better to pull the slide back. You get a little bit more spring tension and consequently a bit more force driving the cartridge into battery. I had two different situations which tended to illustrate this. One was when the seating die on my reloading press slipped a bit and a batch of ammo came out too long. Occasionally, I would get failures to feed when dropping the slide with the slide release, but pulling the slide would get them to chamber. Another case was when the lips of a particular magazine got slightly bent out. I don’t know how or why that happened but that magazine would not load the gun by dropping the slide with the slide release. When I pulled the slide back, this mag would chamber the rounds. So, little variables like that can effect feed reliability and pulling the slide seems to be more reliable than using the slide release.

Dropping the slide with the slide release is faster and may have tactical advantages because your left hand is already in its firing position and may enable you to get onto the target faster. This tactical advantage is negated if the gun fails to feed. I usually use the slide release in matches, but I blew some stages when my ammo was out of spec.

Safety Tests for the M1911/M1911A1 Pistol

Colt 1911 Photo
Colt 1911 Photo

Since most of the M1911 and M1911A1 pistols you will encounter are getting quite elderly, it is important to know how to do basic safety testing on the 1911 pistol. Even on a newer production 1911-pattern guns, if you are acquiring the gun second hand, it is a good idea to perform these safety tests to insure that a tinkerer hasn’t messed up the innards of the gun.

Perform the following safety tests as indicated in (1) through (4) below.

(1) Safety test (fig. 1). With the pistol unloaded, cock the hammer and press the safety upward into the safe (locked) position. Grasp the grip so the grip safety is depressed and squeeze the trigger tightly three or four times. If the hammer falls, the safety must be replaced.

(2) Grip safety test (fig. 2). With the pistol unloaded, cock the hammer and without depressing the grip safety point the pistol downward and squeeze the trigger three or four times. If the hammer falls because the grip safety is depressed by its own weight, the grip safety may be corrected by replacing sear spring.

(3) Half-cock position test (fig. 3 and 4). With the pistol unloaded, draw back the hammer until the sear engages the half-cock position notch. Then squeeze the trigger. If the hammer falls, the hammer or sear must be replaced or repaired. Draw the hammer back nearly to full cock position, do not squeeze the trigger, and then let thumb slip off hammer. The hammer should fall only to the half-cock notch. Replace hammer when it falls past the half-cock position. Note: If you perform this test on a true GI M1911/M1911A1, it will behave in this way. Kimbers will also. Colts (Series 80) and Springfields will allow the hammer to fall from the half-cock because the Series 80 hammer has a shelf rather than a real hook at the half-cock.

(4) Disconnector test.

(a) With the pistol unloaded, cock the hammer. Push the slide group 1/4 inch to the rear (fig. 23) and hold in that position while squeezing trigger. Let slide group go forward, maintaining pressure on trigger. If the hammer falls, the disconnector is worn and must be replaced.

(b) Pull the slide group rearward until the slide stop is engaged (fig. 23). Squeeze the trigger and release slide group simultaneously. The hammer should not fall. If it does, replace the disconnector.

(c) Release the pressure on the trigger and then squeeze it. The hammer should then fall (fig. 23). If it does not fall, check the sear spring for weakness. Also check for a faulty disconnector which would prevent hammer from falling. The disconnector should prevent the release of the hammer unless the slide group is in forward position, safely interlocked. This also prevents the firing of more than one shot at each squeeze of trigger.

Figure 1. Safety test.
Figure 2. Grip safety test.
Figure 3. Half-cock position test (1 of 2).
Figure 4. Half-cock position test (2 of 2).   NOTE: With Hammer back nearly to full cock position, let thumb slip oft hammer.
Figure 4. Half-cock position test (2 of 2). NOTE: With Hammer back nearly to full cock position, let thumb slip oft hammer.
POSITIONING SLIDE GROUP TO DETERMINE IF DISCONNECTOR IS WORN
SLIDE GROUP IN REARWARD POSITION, PREPARING TO RELEASE SLIDE STOP
SLIDE GROUP IN FORWARD POSITION PRIOR TO TESTING HAMMER.  Figure 4. Disconnector test.
SLIDE GROUP IN FORWARD POSITION PRIOR TO TESTING HAMMER. Figure 4. Disconnector test.

See Also:

Malfunctions

Reliability Secrets

Is “Cocked and Locked” Dangerous?


.

Recommended Modifications to the Colt .45 Auto for Self-Defense Use

by Les Bengtson

The Colt .45 automatic pistol, and its copies, are one of the best self defense sidearms currently in production. It does, however, have several deficient areas brought about due to manufacturing short cuts and/or lack of adequate knowledge on the part of its producers. I will endeavor to explain what modifications I feel are necessary to produce to best defensive sidearm and why they are necessary.

The Basic Gun

The best .45 autos are those of commercial Colt production. The Mk IV/Series 70 Government Model and the Combat Commander (pre Series 80) are especially fine weapons. The Series 80 guns, due to the firing pin safety block, are not as desirable for military use. They are more complex and difficult to maintain under field conditions. They do well as urban environment pistols. The fine Officer’s ACP is only available in this configuration.

Military surplus M1911 and 1911A1 pistols are excellent for back-up or spare guns. Quality is generally good although the finish may be somewhat rough. Some have seen extensive use while others have spent most of their time stored in arms rooms. The quality of the steel may not be as good as that of the Series 70/80 Colt. The slide is only “spot hardened”. This does not make them as suitable for extended use by private owners as the commercial Colts. When the military envisioned the weapons being used for an extensive number of rounds (match guns) they refitted the weapons with a “hard slide” of either Colt or other manufacture. These slides are marked NM followed by a contract specification number and are referred to as National Match slides. Some are available through surplus sales. The National Match slide is no better than a commercial Colt slide. For extended use, the military gun should have the slide replaced with either a commercial Colt or a NM slide. This normally raises the price to the point that it is equal to or above the price of a good used 70 Series.

Springfield Armory (Commercial production) guns are currently made to GI specifications in South America. They may be expected to perform as well as US made military .45s. Overall, the quality of the ones I have worked on has been adequate.

Other .45s. Various companies have produced direct or near copies of the M1911 and 1911A1 over the years. They vary in quality both among manufacturers and among production runs by the same manufacturer. Often, the guns require more work to bring them up to the same standards that a Colt can be brought to. Sometimes, even with extra effort, they fall somewhat short of what a good Colt can achieve. Work performed on non-Colts may be more expensive because of this. In the long run, you will have a gun that has cost as much as a Colt and may have lower resale value.

Recommended Modifications

Sights

You should have a good set of high visibility sights on a defensive arm. Adjustable sights are convenient for hunting, competition, or shooting a number of different types of ammunition. I have not found any yet that did not occasionally break, usually at the worst time possible. The Bomar seems to be the best of the lot. I do not recommend them if you only have one self defense pistol. If you have two pistols, adjustable sights on one of them allows it to be used for hunting and formal target shooting.

Fixed sights are much more rugged and stand up indefinitely on the defensive sidearm. The MMC fixed rear sight is a particular favorite of mine. The Novak sight is currently popular. It does not provide any better sight picture than the MMC, costs more and is more expensive to install.

All front sights should be silver soldered in place with high temp silver solder. I have never seen a silver soldered front sight, properly installed, that came loose. I have seen numerous front sights that were only staked in place shoot loose. The only advantage to staking the front sight is that it does not ruin the blue job on the slide. Since other gun modifications will probably require a complete refinishing anyway, have the sight soldered on and you will not have to worry about what to do when/if it breaks loose.
Trigger

There are two components to the trigger problem- length of trigger and weight and crispness of pull.

Trigger length is a function of the size of your hand and the length of your fingers. The pad of the trigger finger should be square on the front of the trigger or you will pull to one side. Try both the long and the short triggers. Choose the one that fits you best. Military triggers (M1911A1) have a rounded cross section at the front which seems to make the trigger pull seem heavier. They should be replaced with a commercial trigger.

Weight of pull should be crisp and about 4 pounds. If your pistol has a crisp pull of 4-4 1/2 pounds you do not need a trigger job. If it does not, you do. Trigger pulls below 4 pounds should be avoided on a defensive gun, but may be desirable on a pistol used primarily for competition. After a trigger job, the slide should never be dropped using the slide stop. This jars the weapon and sometimes drops the hammer to half cock. When the slide is locked back and a new magazine inserted, cycle the slide as if it were in battery and this problem will not occur. Holding the trigger to the rear when dropping the slide from the locked open position has been recommended by some. It does work and may be required if you have not developed a strong grip on the pistol. I have found some students who have a problem with the hammer dropping to half cock on guns that do not do that for me. They did not grip the pistol as strongly as I do and the inertia of the slide going forward caused the trigger to jar the sear slighly, hence the hammer fell to half cock. Try it both ways. My way helps to develop a habit pattern that is used in certain malfunction drills taught in the modern technique of the pistol.

Beavertail or Ducktail Grip Safety

This modification spreads the recoil over a greater area and seems to lead to a better initial grip upon the weapon. Even a properly dehorned standard safety tends to damage the shooting hand when used for extensive practice sessions. Ross Siefried, former World Champion remarked, when he switched to a beavertail, that his hands never became hardened enough to avoid damage with the standard grip safety. The Clark, Wilson and King’s models allow the standard Government spur hammer to be bobbed and used with them. The Brown “high ride” safety requires that a Commander style cone hammer be used. The Brown is an excellent choice for the Officer’s ACP and similar pistols with shorter frames as it allows a higher grip on the pistol. Any of the listed beavertails will work well with the full sized frames.

Speed Safety

The extended safety provides a shelf to rest the thumb on when shooting. The standard safety is sometimes missed in practice. Mel Tappen wrote that a speed safety was cheap insurance against missing the safety when it was really needed. I concur. Additionally, the thumb safety is sometimes bumped into the on-safe position. This has happened at least once in a real life encounter. A speed safety, with the thumb kept on top of the safety when firing, will prevent this problem.

Ambi safeties are available for left handed shooters. They serve little use on a duty pistol for a right handed shooter. The concept that it allows you to use the pistol with the weak hand if you have been shot in the right arm has developed out of IPSC shooting. If you have been shot with the pistol in your hand, the safety is already off. If you are shot with a holstered pistol, you seek cover or attempt to withdraw. The right side safety can be released fairly easily with the index finger of the left hand by anyone who has practiced a few times. We recommend only the strong side safety except for strictly competition pistols.

Throating

Most barrels, except the 70 and 80 Series Government models require throating and matching of the feed ramp to the barrel for any ammunition except hardball. Most of the 70 and 80 Series guns are roughly throated and may hang up with certain types of ammunition. Throating of the barrel and polishing of the feed ramp in the frame are cheap insurance against failure to feed. Lower and teardrop ejection port

Government models normally have a smaller ejection port than Gold Cups and Commanders. Enlarging the ejection port makes them slightly more reliable. Even on pistols that have the lowered ejection port, we open up the port slightly more for increased reliability. This is a small, but important, point.

Teardropping the ejector port is easier on the brass since the slide hits the case before it clears the ejection port and this modification breaks the sharp angle there. While I had previously believed that this is mainly a modification for reloaders, there seems to be some small, but definite, reliability increase with this modification. The slide strikes the cartridge lower on the brass and lessens the possibility of a “smoke stack” malfunction.

Stipple or Checker the Forestrap

Stippling or checkering the forestrap gives a firmer grip than the normal bare frame. Since the main force of the strong hand on the weapon is on the fore and back straps, this translates to a more secure grip on the weapon. This is particularly true on a weapon with a nickel finish.

Checkering looks very pretty and provides a very secure hold. Either 20 or 30 lines per inch may be used. It is acceptable for use in a duty holster. When used in a holster that is inside the pants or close to the body, it tends to abrade the clothing and catch on things. When used concealed, it tends to tear up the jacket lining. It acts as a very sharp file. It can make the concealed draw much more difficult due to this. It is also much more expensive than stippling.

Stippling provides a less abrasive surface than checkering. It is superior in every way to checkering on a normal duty gun.

Finishes

After having your defensive pistol modified, you should shoot the weapon until you are sure that it is set up exactly as you want it and that it functions with complete reliability. Normally, a reblue at the time of the modification is in order. While the bluing only provides marginal protection against rusting, it is often adequate for most shooters. It is also easily removed if you decide you want to make some change in the weapon set up. When you are sure that you have your pistol set up exactly as you want it and you have analyzed your carry pattern (in a belt holster, an inside the pants holster or a gun case, etc.) you are at the point to decide whether you wish to replace the bluing with a more durable (and more expensive) finish. For most people, however, a matte finish blue will be more than sufficient for the majority of their shooting and carrying needs. If you should decide you wish a more durable finish, there are several to choose from. Parkerizing, electroless nickel, hard chrome and TAF-1 (a molibdinum disulfide finish) are available. All are applied finishes that go on the surface of the metal rather than changing the surface as bluing does. They all have better rust resistance than bluing. The TAF-1 finish can also be applied to stainless steel providing both increased rust resistance and do away with the problem of a shiny pistol reflecting light. All applied finishes will wear over time and can allow rusting to take place. Removal of some applied finishes (hard chrome, electro and electroless nickel) require special stripping procedures. TAF-1 and parkerizing can be removed by normal refinishing methods.

Other Modifications

To be based upon personal preference and perceived need.

Funnel magazine well

This makes it somewhat easier to insert a magazine during a speed load or when loading with eyes on the target. Many people, by practicing more, do fine without it. Magazine funnels that bolt on to the bottom of the frame or the S-A Mag funnel/main spring housing should all be custom fitted to the frame. They are not perfect drop ins.

Match barrel bushing

This can provide a slight increase in accuracy. It is generally a part of work done on the more advanced guns. It is not strictly necessary on a self defense pistol. Any pistol having the 70 Series collet bushing should have it replace with either a match or other solid bushing to prevent breakage of the collet fingers.

Recoil Spring Guide

This system is unnecessary on the Government and Commander models and interferes with the proper “pinch check” of the weapon. The Officer’s ACP and some Springfield models have a recoil spring plug that is held in the slide by a small teat rather than the barrel bushing. These break, normally at the worst possible time, rendering the pistol inoperative. They should be replaced. In the case of these pistols, with their more marginal functioning, a full length guide rod and replacement plug is a must. Wilson makes the best system for both the Colt and Springfield pistols.

General

A general smoothing up of the moving parts in the action and “dehorning” (smoothing of all sharp edges) should be a part of any combat tune-up. Other items such as extractor tuning are done on an as required basis. A slightly heavier than normal recoil spring (18 1/2 # for the GM and 20# for the Commander) provide a little extra power when chambering a round. I use them on mine, but did not for many years with no great difference in reliability. Like the speed safety, it is a small bit of extra insurance.

The foregoing is a general guide to the combat modification of the Colt .45 auto. The suggestions are based upon extensive use of this weapon in the military, combat competition and practical instruction. I hope these thoughts will be of use to you in setting up your own self defense piece. Please feel free to contact me if you have any questions.

THIS MONOGRAPH MAY BE REPRODUCED ONLY FOR NON-COMMERICAL USE WITHOUT OTHER PERMISSION OF THE AUTHOR. REPRODUCTION FOR COMMERCIAL USE ONLY BY WRITTEN PERMISSION.

Copyright 1986, 92, 93, 96, 97, 98 by Les Bengtson


L. Bengtson Arms Company
Mesa, Arizona
(480) 981-6375

[email protected]

AAS, Gunsmithing
Certified Police Armorer
Certified Gunsmithing Instructor

My Own Fluff and Buff

By Syd

Fluff and Buff
Fluff and Buff

First, let me say a couple of things about what this article is not. It’s not about trigger jobs and it’s not about repairing problems in troubled guns. For full reliability tuning of the M1911 pistol, see John Marshall’s superb “Reliability Secrets”. Second, there is very little in this article which cannot be accomplished by running a few thousand rounds through the pistol. What we’re talking about here is smoothing moving surfaces, reducing friction and insuring trouble-free operation of a new handgun. While I’ll talk about M1911 pistols, this process isn’t limited to that gun alone. The inspiration for the article actually came from the break-in of a Kel-Tec P32.

The first thing you want to do with your brand new box-stock pistol when you get it home is to open the box and RTFM (“Read The Flippin’ Manual” … well, that’s not really what it stands for, but you get the idea). Understand how to do a basic field strip on the pistol. In most cases, this means removing the slide from the frame, the guide rod and recoil spring from under the barrel, the barrel from the slide, etc., so that you can lube and clean it. (For field strip instructions on the M1911, click here.) Usually, this does not include disassembly of the fire control mechanism. On the M1911 pistol, the field strip does include removal of the firing pin stop, firing pin, barrel bushing, and extractor from the slide.

Examine all of these parts for rough spots and burrs in the metal, paying close attention to the areas where metal slides against metal in the following areas: the slide rails, the cocking lug on the underside of the slide which depresses the disconnector and cocks the hammer as the slide cycles, and the area inside the slide in front of the ejection port which locks down on the barrel. Examine the feed ramp in the frame (the polished crescent at the top of the magazine well on the M1911), the barrel throat and the chamber. On many pistols the feed ramp will be a part of the barrel. On the M1911 (and other pistols which allow for the removal of the firing pin, examine the channel which holds the firing pin to be sure that it is smooth and free of burrs. Some autoloaders like the S&W and Beretta pistols do not lend themselves to having their firing pins removed easily and on these it is best to leave this sort of thing to a professional unless you really know what you’re doing. Examine the bushing area of the slide. This is the area which holds the muzzle end of the barrel when the pistol is in battery. On the M1911, this is a separate part which should be removed during the field strip. Many other pistols have their “bushing” integrated into the slide. This bushing area where the barrel makes contact with the slide should be smooth and free of burrs.

Examine the feed lips of your magazines checking for catches. If you notice deep scratches on your spent brass, you may have some rough spots on the feed lips which can be smoothed down. I will generally use a stone to smooth the feed lips of a magazine. Be careful not to change the basic shape of the lips.

Touch is good. Often you can feel roughness using your fingertips which isn’t readily apparent to the eye. Do these moving surfaces feel smooth? They should. You shouldn’t feel roughness or catches as you run your fingers across them. Examine the feed ramp and chamber with a lighted magnifying glass. The little Kel-Tec had a rough spot in the chamber at about 5 o’clock just inside the breech. Feed ramps and chambers may have mill marks. You don’t need to remove every mill mark but if you suspect that an area might be rough enough to cause problems, you may want to polish it, gently, doing the minimum removal of metal that you can get by with. If your pistol design permits it, put just the slide on the frame without the barrel and spring, and move the slide back and forth. Does it feel smooth or does the slide seem to be binding or catching as it moves?

At this point you may determine that all of these surfaces are smooth and properly finished. Congratulations. You have bought yourself a quality handgun. Apply a light coat of lube to the moving surfaces and a bit of grease to the slide rails and cocking lug, and you’re good to go. I like Break-Free CLP and Rem-Oil for lubricant and Mil-Tec, Mil-Comm, and Wilson Ultimalube for grease, but I have also been known to use military surplus rifle grease in a pinch.

On the other hand, you may have discovered some rough spots or burrs and want to clean them up. Perhaps you just want to polish the feed ramp and chamber a bit. Even quality guns can sometimes have little rough spots that need to be dressed. Or, you may have an Eastern Bloc gun which is a good reliable shooter but has a lot of mill marks and roughness that you want to clean up. With some guns, like the little Kel-Tec, it is generally advisable to do what is called a “fluff and buff” on all of the internal moving surfaces to enhance reliability and function. (For the absolute best “fluff and buff” for the Kel-Tec P32, visit Golden Loki’s site at http://www.goldenloki.com/guns/keltec/prep.htm )

Basic Principles for a Successful Fluff and Buff:

  • Easy Does It
  • Less Is Best
  • Most of this is going to happen in time anyway
  • It is much easier to take metal off than to put it back on
  • Polish, don’t cut
  • It’s better to stop too early than too late

My Tools:

  • Variable Speed Cordless Dremel with polishing kit
  • Red Jeweler’s Rouge
  • DMT serrated knife sharpening wand
  • Extra fine steel wool
  • Curved-edge Arkansas white whetstone designed for sharpening gouges
  • Brownell’s 44/40 Instant Gun Blue for touch-up

Notes on the Dremel Tool:

The Dremel tool is a highly capable and flexible instrument, especially the new variable speed models. Remember also that a lot of guns have been ruined with Dremel tools. The old single-speed Dremels ran too fast for most gun work. I don’t use any of the abrasive bits on the actions of my guns; only the felt polishing heads. I have used the fine stone tips to take off sharps on the outside of Eastern Bloc guns, but that’s all. Some folks will use extremely fine sandpaper, like 600 or 1200 grit to do this sort of work. While this will work on some surfaces and edges, I prefer the Dremel or stones. Professional gunsmiths like stones for many of these tasks.

I like the polishing effect of the Dremel with felt pads and rouge. If you need a bit more grit, the polishing compound that comes with the Dremel polishing kit is OK. I got some wooden-shafted Q-Tips and cut them in half. They fit the collet of the Dremel perfectly and once some extra cotton is removed, they make excellent polishing tools for small areas like the inside of firing pin channels. If I have to take away more metal than the polishing head will do, I’ll use steel wool. If I have to do more than steel wool will take away, I’ll use a fine emery stone, but for a “fluff and buff” you really shouldn’t have to go further than this.

Feed Ramp
Feed Ramp

Polishing the feed ramp with a Dremel:

Use one of the felt polishing tips, either the bullet shaped pad or the small felt wheel. Use red jeweler’s rouge. Jeweler’s rouge is color coded. Red is the finest grit. It doesn’t even feel gritty. It’s the one jewelers use to polish watch cases and such. Take your time and go slow. Polish the inside of the chamber also, especially the area toward the top of the chamber where the bullets make contact with the barrel when they feed. Polish, but do not remove enough metal to change the shape of the ramp or chamber. The rouge will leave a residue which should be cleaned off with powder solvent or lighter fluid. If I find a particularly rough spot inside the chamber, I will tie a bit of steel wool on a ¼” oak dowel and carefully smooth that place down.

Throat
Throat

Gunsmiths have traditionally “throated” the beveled surfaces of the barrel where the bullet enters the chamber in the G.I. M1911 and M1911A1 pistols. This is done by extending the bevel up higher around the breech, rounding the angle where the beveled throat meets the chamber, and in some cases increasing the angle of the throat bevel. Kids, don’t try this at home. Unless you are a certified armorer, you can blow up your gun by taking away metal that supports the cartridge case. Polish this area with the greatest of care. Less is best. You do not want to change the shape of these critical surfaces. With most modern M1911-pattern pistols, this “throating” is done at the factory and you do not need to do more (The barrel in the picture to the right has already been throated). You may, however, need to do some polishing of the ramp, throat and chamber.

Slide Rails:

One of the traditional “accurizing” operations done on the M1911 is tightening the slide rails. This, along with carefully fitting a slightly over-sized bushing, gives Old Slabsides a tighter and more consistent barrel lock-up. On the slide rails, the tightening is done by peening the rails down a little with a hammer and then lapping them to smooth the contact surfaces. The lapping is done by putting a bit of polishing compound in the slide rail grooves and moving the slide back and forth on the frame until it smoothes down. For the M1911, a little tool was developed which locks into the slots which hold the bushing at the front of the slide. It’s just a little handle which makes it easier for the gunsmith to work the slide back and forth during the lapping process. The point of this little digression is that the slide itself is the polishing tool for the slide rails. You can dissolve a bit of jewelers rouge in lighter fluid and paint this fluid into the slide rails. Then put the slide on the frame and work it back and forth.

Some guns may require a bit more work on the slide rails. If you find burrs and catches in the grooves or the rails themselves, these should be carefully worked out with steel wool (or the ultra-fine sand paper). The DMT diamond sharpening wand is long and narrow and is excellent for hard to reach spots in the grooves. The red handled model is their fine grit and it does a good job. Use a very light touch because this instrument can quickly cut metal. The sharpening wand was particularly helpful with the tiny slide rail grooves of the P-32.

The objective with polishing the slide rails is to get a slide which moves smoothly without any grittiness or catches. A slide which is not being slowed by excess friction will feed ammo more reliably and cycle faster.

Cocking Lug
Cocking Lug

Other Areas of the Slide which may require attention:

On the slide, I polish the inside of the barrel bushing, the cocking lug which depresses the hammer when it cycles, and the area in front of the ejection port where the locking lugs are found on the M1911. I will also do a bit of polishing on the breech face. The firing pin channel should be checked for smoothness and given a light coat of oil. The firing pin hole in the breech face should be checked for burrs.

The Five Minute Trigger Job for the M1911

Well, not really, but this is a trick which will help smooth a trigger break which is slightly rough. Cock the hammer and dribble a drop of oil down the front of the hammer. The drop of oil will roll down the hammer onto the sear hooks. Cock and release the hammer a couple of times to get the oil into the sear hooks. Then (with the gun unloaded and ammo stored safely in an adjacent county) dry fire the gun while applying light pressure to the back of the hammer. Do this about ten times. Don’t get muscular with it. This will have the effect of lubricating the sear face and the sear hooks and polishing the sear face. It’s not a huge difference, but depending on the gun, it can result in a noticeable smoothing of the trigger break.

Break-in

The break-in of a pistol does not involve the mysticism and voodoo often afforded precision high powered rifles. Just take it to the range and shoot it, a hundred rounds or so, watching for any malfunctions or strange behavior. Then bring it home and clean it well and re-apply lubrication. If you get through five of these hundred-round cycles without a malfunction, you have a solid and reliable pistol. Be sure to test any new service ammo with 200 rounds before adopting it. At 1000 rounds you can consider the pistol fully broken-in. Don’t be afraid to dry fire your pistol. It’s good practice and, despite a lot of mythology which goes around about dry firing, it will not harm modern center-fire pistols.

Lubrication

Different models of guns have different needs for lubrication. M1911’s tend to like some oil and slide grease. Glocks and Berettas don’t seem to need much. Climate also plays a role in this equation too. In a very dry and dusty environment, grease can catch grit in a tightly fitted gun and hinder reliability. In a wet climate, a light coat of oil will guard the metal from rust. In an extremely cold climate, oil and grease can congeal and even freeze. A one-size-fits-all prescription for lubrication is just not possible. If you operate in a moderate climate, some protective oil and slide grease will most likely help the gun to function better and protect it from rust, corrosion and excessive friction on the moving parts. We recommend Mil-Comm grease, oil and cleaner.

Get a Grip

There is one part of autoloader reliability which is not hardware related: your grip. Even the most superbly reliable autoloader can be tricked into a malfunction by a weak grip. The physics of the situation is that an autoloader needs a firm support against which it can recoil. If you find that you are having jams on a pistol which other experienced shooters fire without malfunctions, it may be that you need a firmer grip on the gun. It may be as simple as remembering to grip the gun firmly when you fire it. It may also mean doing some exercise to strengthen your hands and arms. Squeezing a tennis ball, push-ups, and punching a bag all help. If you watch the master pistol shooters, you will notice that they don’t allow the muzzle of their guns to flip up much if at all. The more the pistols flips up and back during the recoil cycle, the greater your chances are of experiencing a malfunction.

The Single Best, Cheapest, Easy-To-Do Reliability Enhancement for the M1911 Pistol

If you shoot full-powered ammo, install an extra power recoil spring. I recommend an 18.5# spring for Government Models and 22# springs for Commander-length guns. This modification reduces or eliminates feed failures and reduces the battering on the frame of the gun. Some have said that it also reduces felt recoil, but I don’t notice much of a difference. Don’t do this if you’re planning to use light target loads because the light loads may not have enough power to cycle the slide completely. Another option is to save your original spring and switch it back in for the lower powered ammo.

Wrapping it up

The fluff and buff is basically a matter of helping along the natural effects of friction and wear, and it grows out of the primary observation that guns which are broken in well tend to be more reliable than pistols which are new. Many will say that a pistol is broken in at 500 rounds. My observation is that this should be considered a bare minimum. 1000 rounds, especially for a serious duty gun, is a better mark. As I said at the outset, very little of this cannot also be accomplished by running a couple thousand rounds through the gun. The trouble is that we don’t always have the luxury of firing 2K rounds before we put a gun into service. Be gentle with your polishing and let logic guide you and you won’t have any problems. It is entirely possible that you may buy a gun which will need none of this whatsoever. This is no cause for alarm. Sometimes a pistol just comes off the line right and nothing more is needed.